
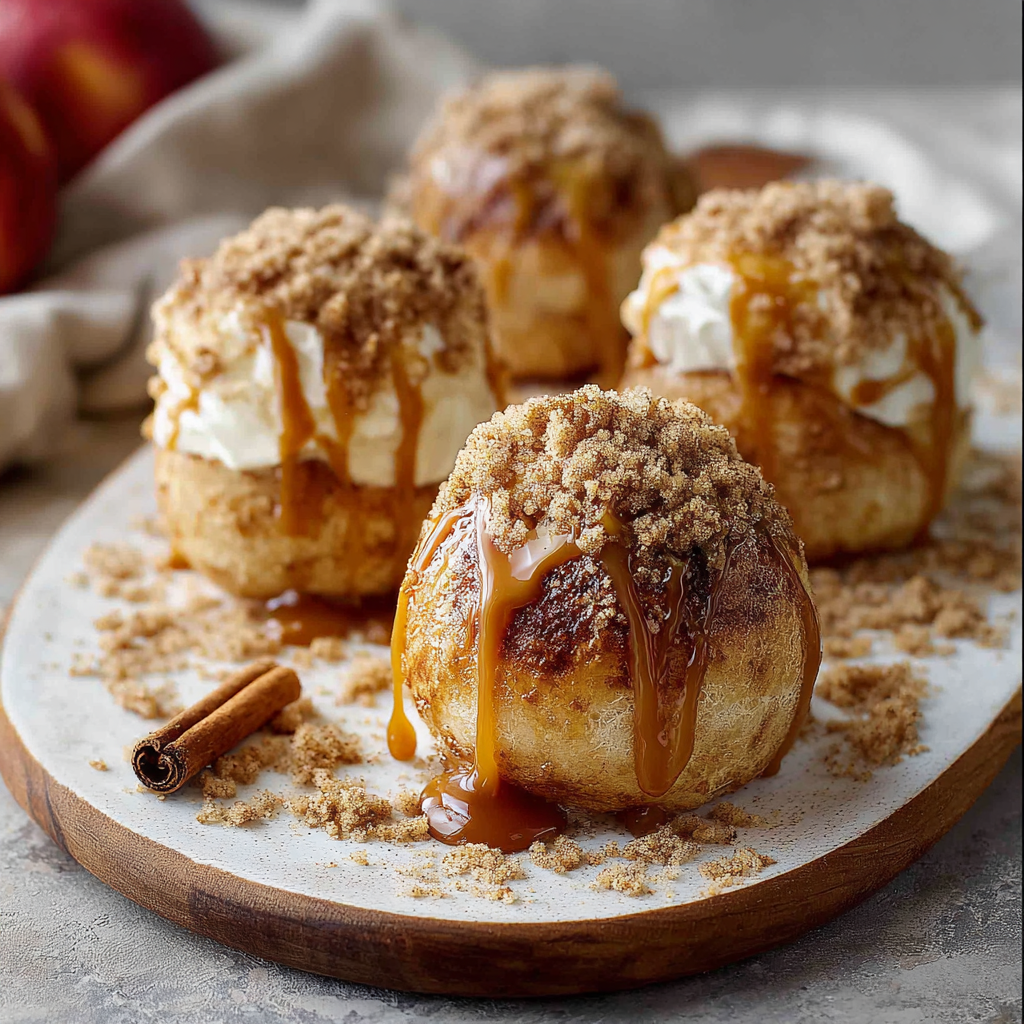
Caramel Apple Pie Bombs

Soft, buttery pockets of biscuit dough filled with warmly spiced apple and a gooey caramel center — an irresistible handheld twist on classic pie.

This little handheld treat has been a weekend favorite at my kitchen for years. I stumbled upon the idea one rainy afternoon while craving a slice of warm apple pie but not wanting to fuss with a full crust: what if I could wrap all the flavors of pie into a single, portable bite? The result was so addictive that it became our go-to after-school snack and a party favorite. The exterior bakes up golden and slightly crisp, while the interior is a tender, spiced apple mixture wrapped around molten caramel. Each bite gives you a contrast of textures — a light, pillowy exterior, soft tender apple, and that decadent, oozing caramel surprise.
I discovered the best version of this by testing different apples and adjusting the sugar and cinnamon balance. Using a firmer apple like Granny Smith or Honeycrisp keeps the filling from turning to mush while giving a pleasant tart-sweet counterpoint to the caramel. These are simple to make with everyday ingredients, yet they feel indulgent — perfect for cozy afternoons, potlucks, or a bright finish to a seasonal brunch. They bake quickly, are sharable, and keep well for easy reheating when the craving hits again.
Why You'll Love This Recipe
- Fast: Ready in about 30 minutes from start to finish — perfect for last-minute guests or an afternoon treat.
- Accessible ingredients: Uses pantry staples and one can of refrigerated biscuit dough for effortless assembly.
- Handheld and shareable: Makes 8 individual portions that are easy to pass around at parties or pack for lunch.
- Balance of textures: Tender biscuit exterior, soft spiced apple, and a molten caramel center for a satisfying bite.
- Flexible: Make-ahead friendly — you can assemble and chill the bombs before baking, or freeze unbaked for later.
- Crowd-pleasing: Kids love the surprise caramel center, while adults appreciate the nostalgic pie flavors in a modern format.
In my kitchen these were a revelation: my neighbor asked for the recipe after trying one, and my teenager requested them for every birthday brunch last year. I love how they feel festive without fuss — they bring the comfort of pie and the convenience of a finger food to any table.
Ingredients
- Apples: Use 2 medium apples (about 1 1/2 cups finely chopped) such as Granny Smith for tartness or Honeycrisp for sweetness — peel and finely dice so the filling cooks evenly and remains tender.
- Brown sugar: 2 tablespoons packed brown sugar adds deep caramel notes and helps thicken the apple filling; light or dark both work, but dark brown gives a richer flavor.
- Ground cinnamon: 1 teaspoon provides warm spice — use fresh ground cinnamon for best aroma.
- Salt: A small pinch to balance sweetness and heighten the apple flavor.
- Unsalted butter: 1 tablespoon for cooking the apples; melts into the filling and carries flavor without adding excess salt.
- Refrigerated biscuit dough: 1 can (16.3 ounces) standard refrigerated biscuit dough — these provide a tender, flaky shell that browns beautifully.
- Caramel candies: 8 individually wrapped caramels (unwrapped before use) — classic chewy caramels work best; soft caramels will melt into a gooey center.
- Melted butter: 2 tablespoons to brush the tops for golden color and shine.
- Cinnamon sugar (optional): Mix 1 tablespoon granulated sugar with 1/2 teaspoon ground cinnamon to sprinkle on top for extra sparkle and crunch.
Instructions
Prepare the apple filling: Heat a small skillet over medium heat and melt 1 tablespoon unsalted butter. Add 2 peeled and finely chopped apples and cook, stirring, for about 3 to 4 minutes until the apples begin to soften but still hold shape. Stir in 2 tablespoons brown sugar, 1 teaspoon ground cinnamon, and a pinch of salt. Cook 1 to 2 more minutes until the sugar dissolves and the mixture is glossy. Remove from heat and let cool to warm — too-hot filling will make the biscuit dough soggy. Preheat and prepare dough: Preheat the oven to 375°F (190°C). Line a baking sheet with parchment paper. Open the 16.3-ounce can of refrigerated biscuit dough and separate the dough into 8 biscuits. Working on a lightly floured surface or a clean counter, gently flatten each biscuit into a 3- to 4-inch disk using your fingers or a rolling pin. Thinner edges help seal, but don’t overwork the dough or it will become tough. Assemble the bombs: Place about 1 to 2 tablespoons of the cooled apple mixture in the center of each flattened biscuit. Nestle one unwrapped caramel candy on top of the apples. Gather the edges of the dough up and around the filling, pinching tightly to seal. Turn seam-side down on the prepared baking sheet. If the dough resists sealing, wet your fingertip with a drop of water to help it adhere. Brush and finish: Brush each sealed pocket with 2 tablespoons melted butter for color and flavor. If using, sprinkle the tops with cinnamon sugar. Make sure each ball is evenly coated so they brown consistently. Leave a small gap between each on the baking sheet to allow expansion. Bake and cool: Bake in the preheated 375°F oven for 12 to 15 minutes, or until golden brown and puffy. Rotate the pan halfway through baking for even color. Remove from the oven and let cool 5 minutes on the pan — this helps the caramel set slightly before biting. Serve warm: Serve while still warm for the best molten-caramel experience. To serve later, rewarm in a 325°F oven for 6 to 8 minutes. Be cautious when biting in — the caramel will be very hot immediately after baking.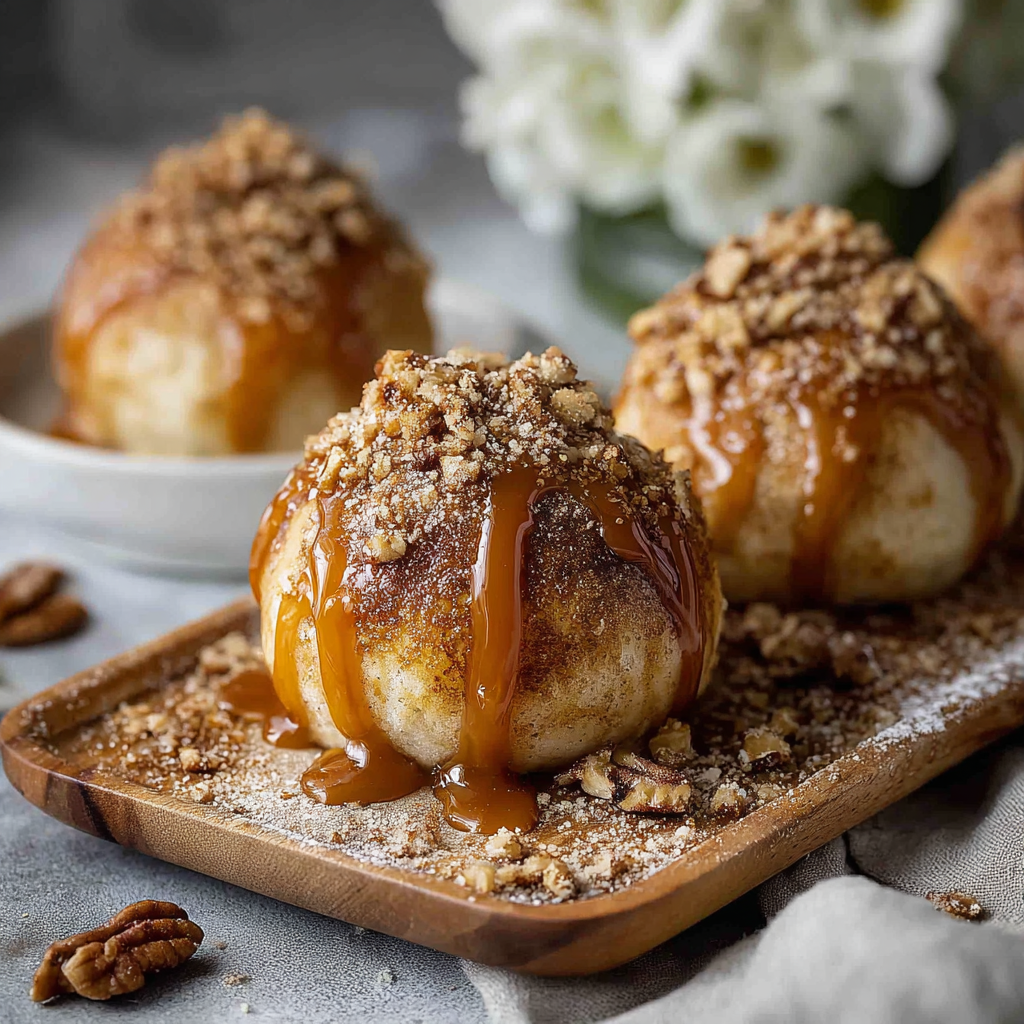
You Must Know
- Storage: These hold in the refrigerator for up to 3 days in an airtight container; reheat at 325°F for 6 to 8 minutes.
- Freezing: Unbaked, sealed bombs freeze well for up to 3 months — bake from frozen, adding 3 to 5 minutes to the bake time.
- Nutritional note: Each portion is a treat — moderate portioning helps keep it an occasional indulgence.
- Hot caramel risk: Allow a short cooling time after baking to avoid burns from the molten center.
My favorite part is the reveal: when you cut or bite into one and that river of warm caramel slowly appears, everyone smiles. These have become the signature item I bring to casual gatherings because they’re easy to transport and always disappear first.
Storage Tips
To keep these at peak quality, cool completely and store in a single layer in an airtight container in the refrigerator for up to 3 days. Avoid stacking them while warm to prevent sticking. For longer storage, freeze unbaked assembled bombs on a tray until firm, then transfer to a freezer bag; bake from frozen, adding a few extra minutes to the time. To reheat baked bombs, place them on a sheet at 325°F for 6 to 8 minutes so the caramel softens without burning the exterior. If you’re packing them for a picnic, wrap individually in foil and keep them in an insulated bag to maintain warmth for up to 2 hours.
Ingredient Substitutions
If you’d like to tweak the filling, try swapping the brown sugar for 1 tablespoon maple syrup plus 1 tablespoon granulated sugar for a maple-kissed profile. For a dairy-free version, use a plant-based butter and dairy-free caramel candies. If you don’t have refrigerated biscuit dough, use 8 small rounds of store-bought pie dough or puff pastry — note that puff pastry will create a flakier exterior and may require a slightly higher oven temperature for crisping. For a less-sweet bomb, reduce caramel to 6 pieces and add a squeeze of lemon to the apple filling to lift the flavors.
Serving Suggestions
Serve warm with a small scoop of vanilla ice cream or a drizzle of heavy cream for a decadent finish. For brunch, pair with strong coffee or spiced tea to balance the sweetness. Garnish with a dusting of powdered sugar or a light sprinkle of cinnamon sugar for a festive touch. If serving as appetizers at a fall gathering, arrange them on a wooden board with small forks and napkins — they’re hearty enough to be a centerpiece on a dessert table, yet perfectly portioned for sampling.
Cultural Background
Handheld fruit-filled pastries have roots across many traditions — from empanadas to turnovers and classic American fruit pies. These bites are a playful modern riff on the iconic apple pie, preserving the flavors and spices we associate with fall desserts but adapting them into a casual, portable format. During harvest seasons, families historically made portable sweets that could be shared outdoors; these bombs echo that spirit by letting you carry the warmth of home-baked fruit in a single serving.
Seasonal Adaptations
Spring and summer call for swapping apples with finely chopped peaches or pears and using caramel sparingly or replacing it with a dollop of cream cheese filling. For winter holidays, mix in a pinch of nutmeg and cloves or use ginger-carved caramels to add a festive note. Adding chopped toasted pecans to the filling before assembly offers a pleasant crunch and a nutty complement to the caramel in cooler months.
Meal Prep Tips
Assemble multiple batches and freeze unbaked for quick baking on demand. Label and date your frozen tray packs so you can pull out exactly how many you need. For breakfast prep, bake in advance and reheat single portions in a toaster oven to preserve crispness. Pack reheated bombs in individual parchment-wrapped bundles for grab-and-go mornings — they’re surprisingly sturdy when wrapped well.
These caramel-stuffed pockets are the kind of recipe that invites improvisation and sharing. Whether you’re feeding family or bringing them to a friend’s potluck, their warm, nostalgic flavors and easy assembly make them a small but memorable culinary gesture. Try them, adapt them to your pantry, and enjoy the smiles they bring.
Pro Tips
Use a firmer apple like Granny Smith to prevent the filling from becoming mushy during cooking.
Cool the cooked apple filling slightly before assembling to avoid making the dough soggy.
Freeze unbaked bombs on a tray before bagging to keep them from sticking together.
Brush with melted butter for the best color and sprinkle cinnamon sugar right before baking.
This nourishing caramel apple pie bombs recipe is sure to be a staple in your kitchen. Enjoy every moist, high protein slice — it is perfect for breakfast or as a wholesome snack any time.
Tags
Caramel Apple Pie Bombs
This Caramel Apple Pie Bombs recipe makes perfectly juicy, tender, and flavorful steak every time! Serve with potatoes and a side salad for an unforgettable dinner in under 30 minutes.
Ingredients
Apple filling
Assembly
Instructions
Prepare the apple filling
Melt 1 tablespoon unsalted butter in a small skillet over medium heat. Add 2 peeled and finely chopped apples and sauté 3–4 minutes until starting to soften. Stir in 2 tablespoons packed brown sugar, 1 teaspoon ground cinnamon, and a pinch of salt; cook 1–2 more minutes until glossy. Remove from heat and let cool slightly.
Preheat and prepare dough
Preheat oven to 375°F. Line a baking sheet with parchment. Open the 16.3-ounce biscuit can and separate into 8 biscuits. Flatten each biscuit into a 3–4 inch disk on a lightly floured surface.
Assemble bombs
Place 1–2 tablespoons of the cooled apple filling in the center of each disk and top with one unwrapped caramel. Gather the dough edges around the filling and pinch to seal. Place seam-side down on the prepared sheet.
Brush, bake, and cool
Brush each pocket with 2 tablespoons melted butter and sprinkle cinnamon sugar if desired. Bake at 375°F for 12–15 minutes until golden. Cool on the pan 5 minutes to let the caramel set slightly before serving.
Last Step: Please leave a rating and comment letting us know how you liked this recipe! This helps our business to thrive and continue providing free, high-quality recipes for you.
Nutrition
Did You Make This?
Leave a comment & rating below or tag
@solushcooks on social media!
Categories:
You might also like...
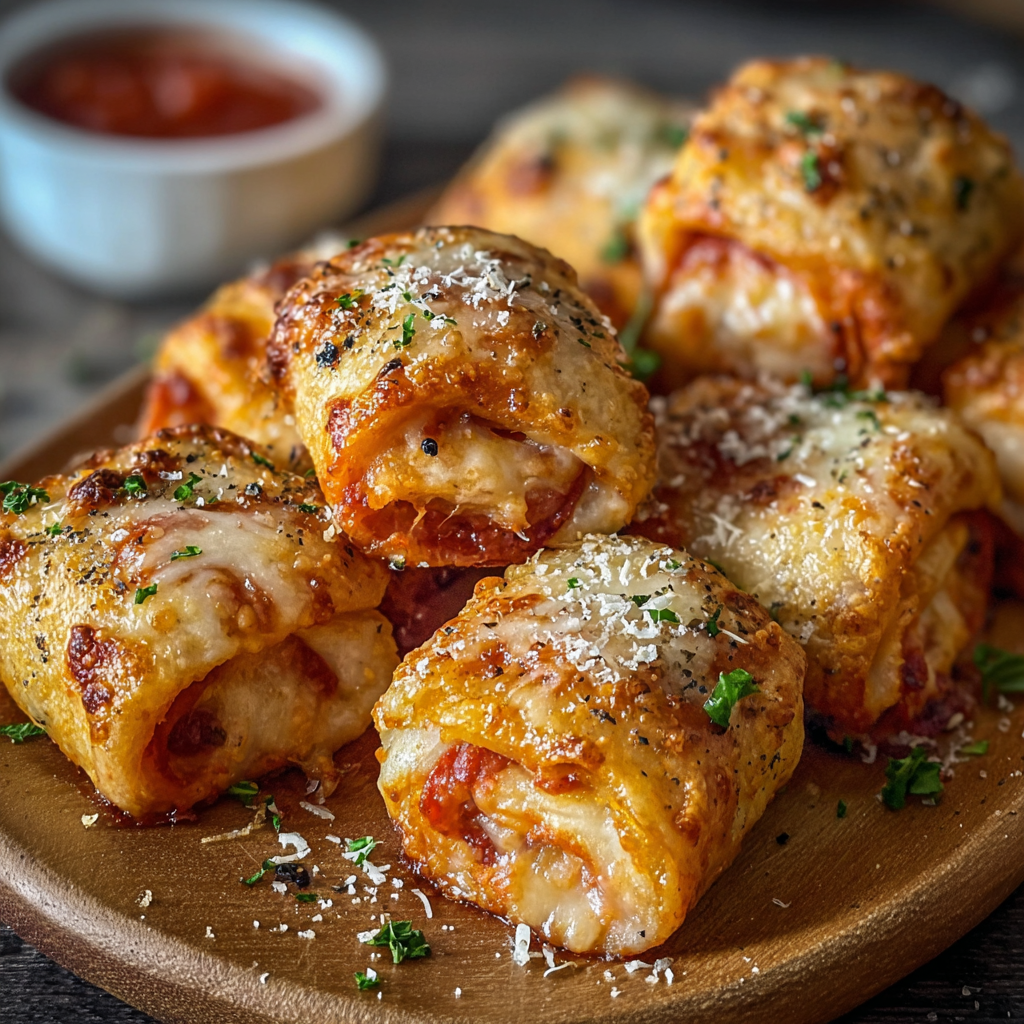
Air-Fried Pizza Rolls
Crispy, golden pockets of melted mozzarella and pepperoni made in the air fryer for a quick party snack or weeknight treat.

Air-Fried Rice Paper Noodle Rolls
Crispy, light rice paper rolls filled with vermicelli, vegetables and tofu or shrimp, finished in the air fryer for a healthy, snackable treat.
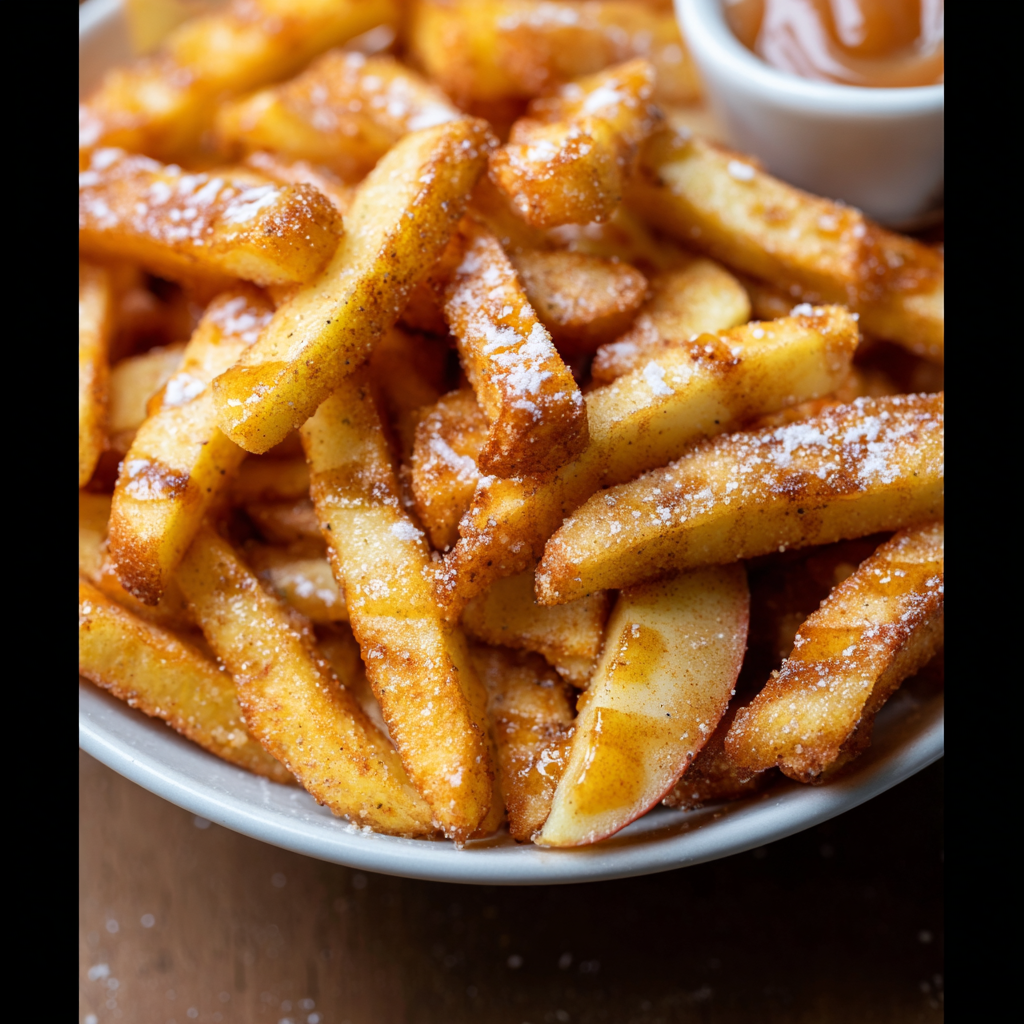
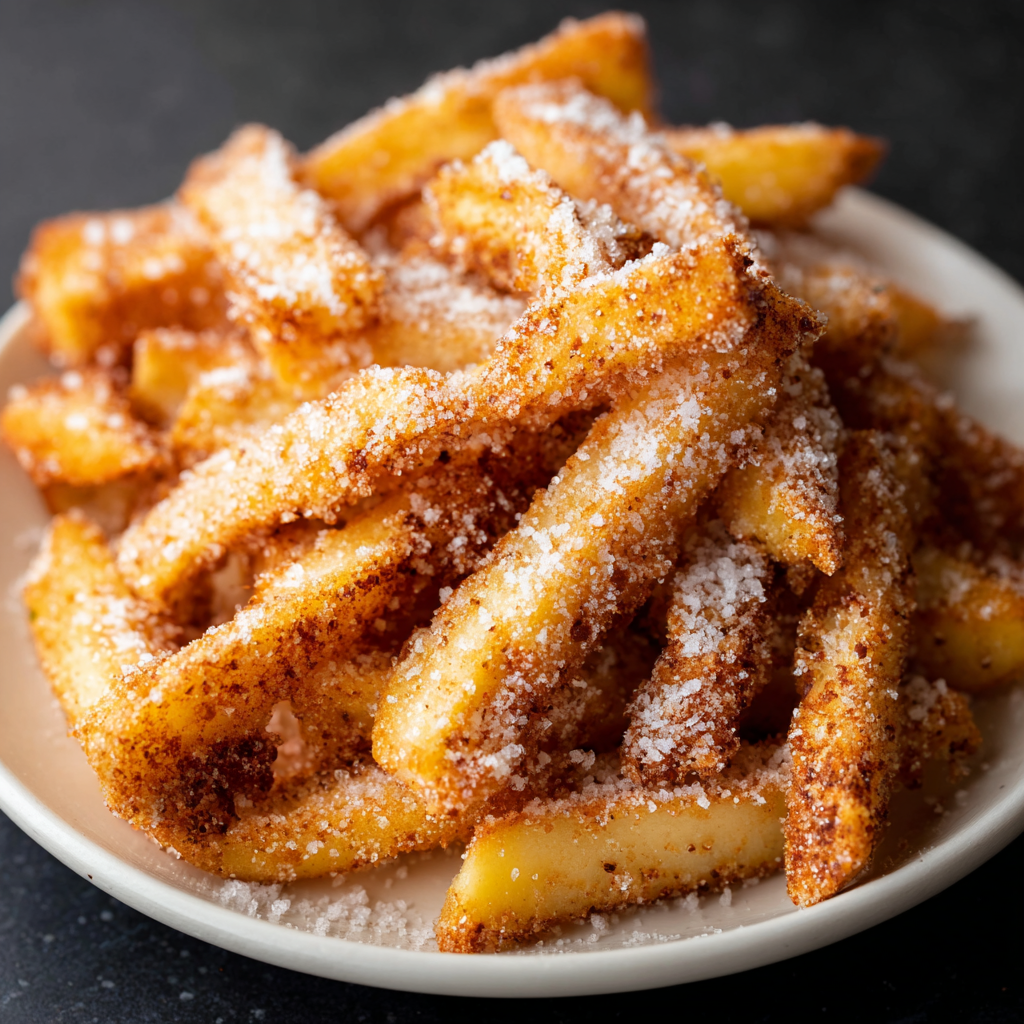
Air Fryer Apple Fries
Crispy, cinnamon-sugar coated apple fries made in the air fryer — a quick, family-friendly snack or dessert ready in under 30 minutes.
Did You Make This?
Leave a comment & rating below or tag @solushcooks on social media!
Rate This Recipe
Share This Recipe
Enjoyed this recipe? Share it with friends and family, and don't forget to leave a review!
Comments (1)
This recipe looks amazing! Can't wait to try it.
Comments are stored locally in your browser. Server comments are displayed alongside your local comments.

Hi, I'm Lena!
What's Popular
30-Minute Meals!
Join to receive our email series which contains a round-up of some of our quick and easy family favorite recipes.