
Christmas Bars

Chewy, chocolatey holiday bars layered with a buttery graham crust, sweet condensed milk, gooey marshmallows and melty chocolate chips — perfect for festive gatherings.
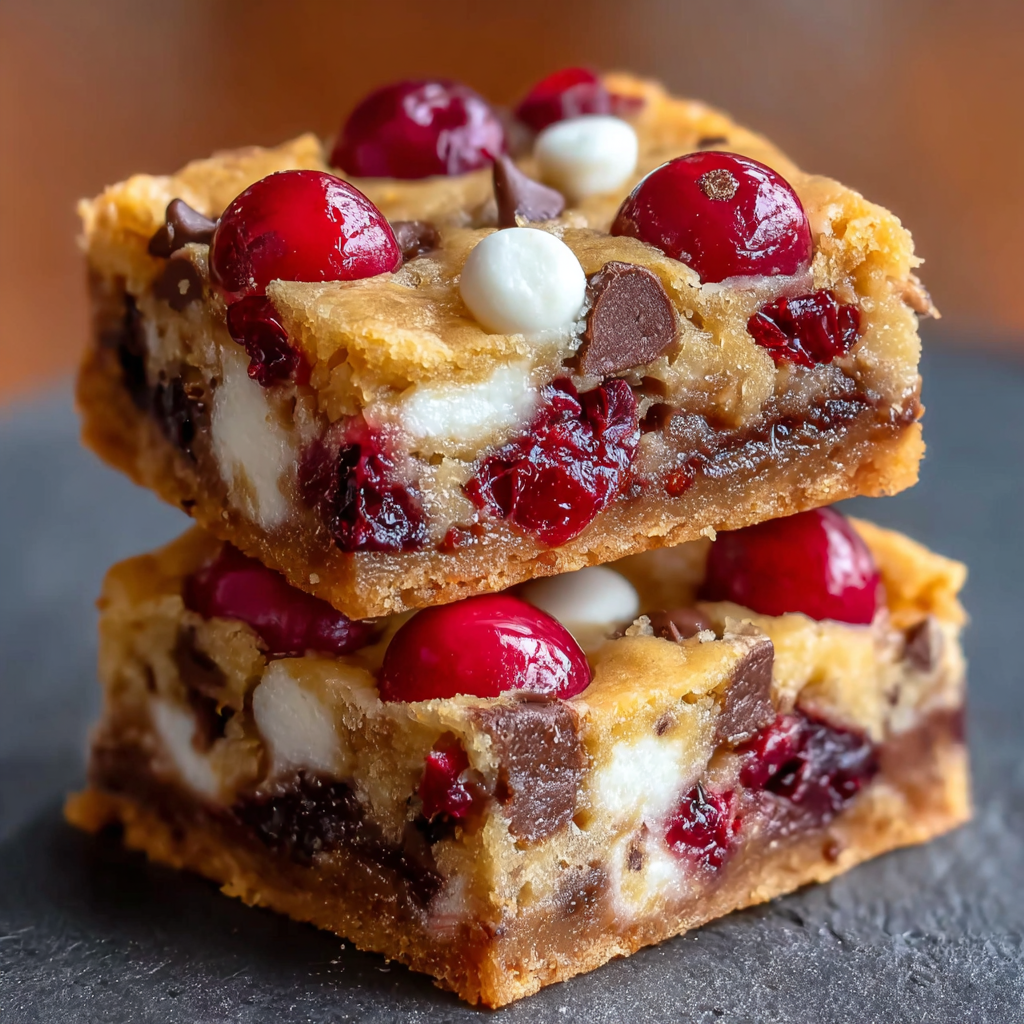
This recipe for Christmas bars is one of those treats that instantly transports me to the first chilly December I baked with my sister while the tree lights blinked in the background. We were short on time and imagination but had a pantry full of staples: graham crackers, a can of sweetened condensed milk, and a bag of mini marshmallows. The result was unexpectedly nostalgic — a crisp, cocoa-dusted base with an indulgent, chewy top that tasted like a toasted s'more updated for the holidays. Ever since, these have shown up on cookie trays, potluck tables, and after-dinner dessert plates every year.
What makes these bars special is their balance of textures: a slightly crunchy, buttery base that gives way to a chewy, almost fudge-like middle, topped with pillowy marshmallows and pockets of molten chocolate. They’re forgiving to make, travel well, and are endlessly adaptable — switch the chips or leave out the nuts and you still end up with a crowd-pleasing treat. I love how they create small, perfect moments: a warm square handed to a neighbor, a kid’s face lighting up after the first bite, or the way leftovers taste even better the next day after the flavors have settled.
Why You'll Love This Recipe
- Ready with straightforward pantry staples in about 35 minutes total, making it ideal for last-minute celebrations and spontaneous baking.
- Texture contrast: a buttery graham base, a chewy condensed-milk interior, and toasted marshmallow and chocolate pockets on top.
- Flexible: easily made dairy-free by substituting melted coconut oil and dairy-free chocolate chips; nuts are optional for allergy-friendly batches.
- Make-ahead friendly — cool completely and chill for cleaner slices and easier transport to parties or potlucks.
- Kid-approved and crowd-pleasing: the marshmallow topping is playful and festive, perfect for holiday cookie trays or dessert bars.
- Minimal equipment and basic techniques make this accessible for home cooks of any level while still delivering a polished result.
In my house, these bars became an instant hit the first year I made them; neighbors asked for the recipe and my nephew declared them his new favorite dessert. They’re the kind of thing you’ll catch yourself making just because — they’re comforting, fast, and reliably delicious.
Ingredients
- Graham cracker crumbs (2 cups): Look for whole graham crackers and crush them fresh for the best texture, or buy pre-crumbed if you’re short on time. They form the sweet, slightly nutty base that contrasts the marshmallow top.
- Unsweetened cocoa powder (1/4 cup): Use a good-quality Dutch-processed or natural cocoa depending on your preference; this deepens the chocolate flavor in the crust and keeps it from tasting overly sweet.
- Powdered sugar (1 1/2 cups): Adds smooth sweetness and helps bind the crumb mixture without graininess; sift if lumpy.
- Unsalted butter, melted (3/4 cup): Provides richness and helps the crumbs set; swap for 3/4 cup melted coconut oil for a dairy-free option.
- Sweetened condensed milk (1 can, 14 oz): The secret to chewy, glossy bars — pour it over the warm base to meld with the crumbs and create a cohesive filling.
- Mini marshmallows (3 cups): Use mini for even distribution and quick toasting; regular marshmallows can be chopped and used but may yield uneven pockets.
- Chocolate chips (1 1/2 cups): Choose semi-sweet or milk chocolate according to taste; dark chips give a more adult chocolate note, white chips produce a sweeter finish.
- Chopped nuts (1/2 cup, optional): Toasted walnuts or pecans add crunch and contrast; leave out for nut-free households or replace with seeds.
Instructions
Prepare the oven and pan: Preheat the oven to 350°F (175°C). Line an 8x8-inch baking pan with parchment leaving an overhang for easy removal; lightly grease the parchment. This ensures even baking and clean, neat slices when cooled. Make the crust: In a large bowl combine 2 cups graham cracker crumbs, 1/4 cup unsweetened cocoa powder, and 1 1/2 cups powdered sugar. Pour in 3/4 cup melted unsalted butter and stir until the mixture holds together when pressed. Press firmly into the prepared pan to form an even layer — use the bottom of a measuring cup for tight compaction. Bake the base: Bake the pressed crust for 8–10 minutes until it’s set and fragrant. The brief bake ensures the crumbs bond with the butter, giving structural integrity so the bars slice cleanly later. Add the condensed milk: Remove the pan from the oven and immediately pour the entire 14 oz can of sweetened condensed milk evenly over the warm crust. The heat helps the milk spread and meld with the crumb layer for a chewy center — spread gently with a spatula if needed. Top and toast: Scatter 3 cups mini marshmallows, 1 1/2 cups chocolate chips, and 1/2 cup chopped nuts (if using) evenly over the condensed milk. Return to the oven for 5–7 minutes until marshmallows begin to puff and chips soften. For a toasted finish, switch to broil for 30–60 seconds, watching closely to avoid burning. Cool and slice: Allow the bars to cool on a wire rack until room temperature, then chill in the refrigerator for at least 1 hour to firm up. Use the parchment overhang to lift the slab from the pan and slice into 16 squares with a sharp knife warmed under hot water for cleaner edges.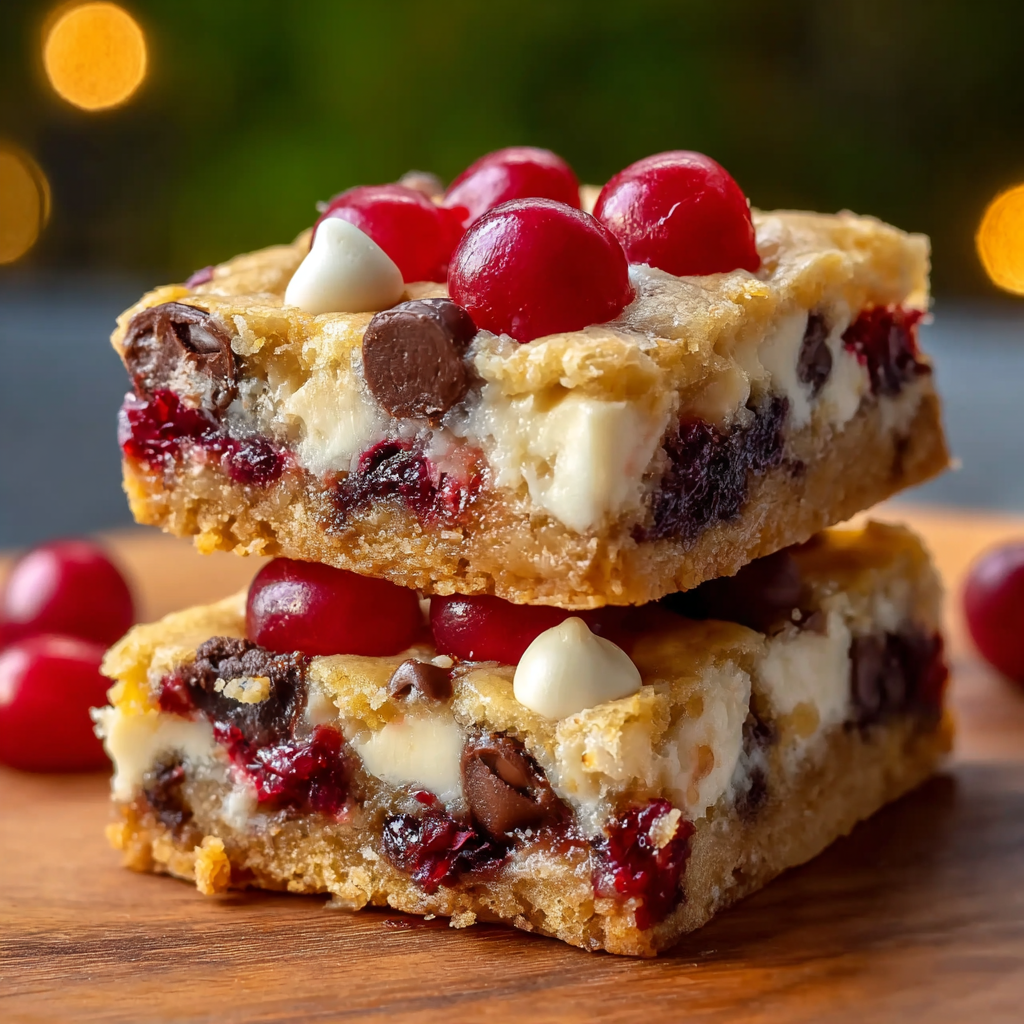
You Must Know
- High in sugar and calories — these are a festive treat best enjoyed in moderation; they freeze well for up to 3 months when tightly wrapped.
- Store in an airtight container in the fridge for up to 5 days to maintain the marshmallow texture and preserve freshness.
- To make dairy-free, replace butter with melted coconut oil and choose dairy-free chocolate chips; texture will be slightly firmer when chilled.
- Use an 8x8-inch pan for the proportions listed; scaling up to a 9x13-inch pan will make thinner bars and reduce bake time slightly.
One of my favorite things about these bars is how forgiving they are: even if the marshmallows brown unevenly, the taste is still wonderful. I once brought a pan to a neighborhood cookie swap where one tray had been broiled a touch too long — people still fought over the squares. It’s a forgiving, joyful recipe that invites tweaks and creative toppings.

Storage Tips
Store cooled bars in a single layer or separated with parchment to avoid sticking. At room temperature they’re best consumed within 24 hours; refrigeration extends life to 4–5 days and helps with slicing. For longer storage, wrap individual squares tightly in plastic wrap and place them in a freezer-safe container for up to 3 months. To thaw, move wrapped bars to the refrigerator overnight, then bring to room temperature for 20–30 minutes before serving to refresh the marshmallow texture and soften the chocolate.
Ingredient Substitutions
If you need to swap ingredients, use crushed digestive biscuits for the graham crumbs in many regions. For a gluten-free version, choose certified gluten-free graham crackers or use ground gluten-free cookies. Replace butter with melted coconut oil (measure the same) for dairy-free results; expect a slightly firmer set when chilled. Swap mini marshmallows for vegan marshmallows if avoiding gelatin, and select dairy-free chocolate chips to maintain the chocolate pockets. Nuts can be substituted with roasted sunflower seeds for a nut-free crunch.
Serving Suggestions
Serve squares on a festive platter dusted with a light sift of cocoa or powdered sugar for a holiday touch. These pair beautifully with hot cocoa, spiced coffee, or an espresso shot. For a party, cut into small bite-sized pieces and arrange with peppermint candies or seasonal fruit. Add a sprinkle of flaky sea salt to individual squares for a sweet-salty contrast, or top with crushed candy canes for a peppermint variation that’s perfect for holiday gatherings.
Cultural Background
These layered bars are a modern adaptation of classic American holiday confections that combine familiar desserts like graham-cracker-based crusts and marshmallow-topped sweets. They draw inspiration from nostalgic treats like rocky road and s’mores, both of which celebrate simple combinations of chocolate, marshmallow, and crunchy elements. Over decades, home bakers have adapted these flavors into tray bakes for festive occasions where easy-to-serve slices are preferred over individual cookies.
Seasonal Adaptations
For winter holidays, fold in 1/2 cup crushed peppermint or use red and green sprinkles atop the marshmallows before toasting. In colder months, stir a pinch of cinnamon or orange zest into the crumb mixture for warmth. For spring or summer, swap in dried cherries and white chocolate chips for a brighter profile. Adjust toppings and garnishes to match the season — toasted coconut makes a great tropical holiday twist, while chopped dried cranberry adds acidity for balance.
Meal Prep Tips
Make the crust and chill it in the pan the day before to save time; pour the condensed milk and add toppings the next day, then bake and serve. For packed lunches or cookie swaps, slice bars and stack with parchment sheets in between to prevent sticking. Use airtight BPA-free containers for transport and keep chilled with an ice pack if traveling. If making several batches for a party, cool completely and freeze half the pans; thaw in the fridge and finish with a brief oven warm-up to refresh the marshmallows.
These Christmas bars are a dependable, festive treat that rewards small efforts with big smiles. Whether you choose to keep them classic or experiment with flavors, they embody the joys of simple holiday baking — quick to make, easy to share, and impossible to eat just one.
Pro Tips
Press the crumb base firmly using the bottom of a measuring cup to create a compact crust that holds together after baking.
After baking, chill the pan for at least 1 hour before slicing to prevent the filling from oozing and to achieve tidy squares.
If broiling to toast marshmallows, stay attentive — broilers can go from golden to burnt in seconds; keep the oven door slightly open and watch closely.
This nourishing christmas bars recipe is sure to be a staple in your kitchen. Enjoy every moist, high protein slice — it is perfect for breakfast or as a wholesome snack any time.
FAQs about Recipes
Can I make these bars dairy-free?
Yes — to make dairy-free, replace the butter with melted coconut oil and use dairy-free chocolate chips; marshmallows must also be vegan (gelatin-free).
How do I get neat, clean slices?
Cool completely then chill for at least 1 hour; use a sharp knife warmed under hot water for cleaner slices.
Tags
Christmas Bars
This Christmas Bars recipe makes perfectly juicy, tender, and flavorful steak every time! Serve with potatoes and a side salad for an unforgettable dinner in under 30 minutes.
Ingredients
Base
Filling & Topping
Instructions
Preheat and prepare pan
Preheat oven to 350°F (175°C). Line an 8x8-inch baking pan with parchment leaving an overhang and lightly grease the parchment.
Combine crumb ingredients
Mix graham crumbs, cocoa powder, and powdered sugar in a bowl. Stir in melted butter until the mixture clumps when pressed.
Press and bake the base
Press the crumb mixture firmly into the prepared pan and bake for 8–10 minutes until set and aromatic.
Add condensed milk
Remove the pan from the oven and pour the 14 oz can of sweetened condensed milk evenly over the warm crust; spread gently if needed.
Top with marshmallows and chocolate
Scatter mini marshmallows, chocolate chips, and optional nuts evenly over the condensed milk; return to oven for 5–7 minutes.
Optional broil and cool
Broil 30–60 seconds to toast the marshmallows if desired, watching closely. Cool to room temperature then chill for at least 1 hour before slicing.
Last Step: Please leave a rating and comment letting us know how you liked this recipe! This helps our business to thrive and continue providing free, high-quality recipes for you.
Nutrition
Did You Make This?
Leave a comment & rating below or tag
@solushcooks on social media!
Categories:
You might also like...
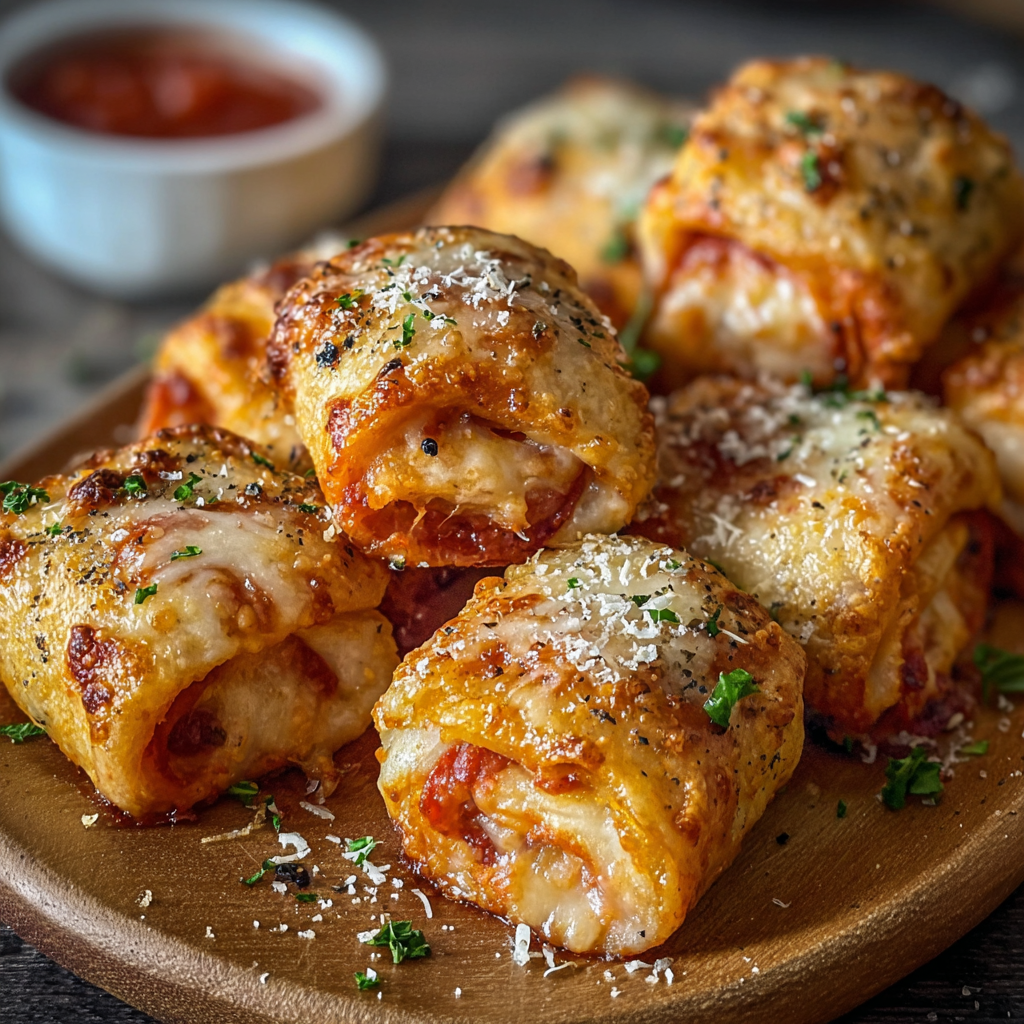
Air-Fried Pizza Rolls
Crispy, golden pockets of melted mozzarella and pepperoni made in the air fryer for a quick party snack or weeknight treat.
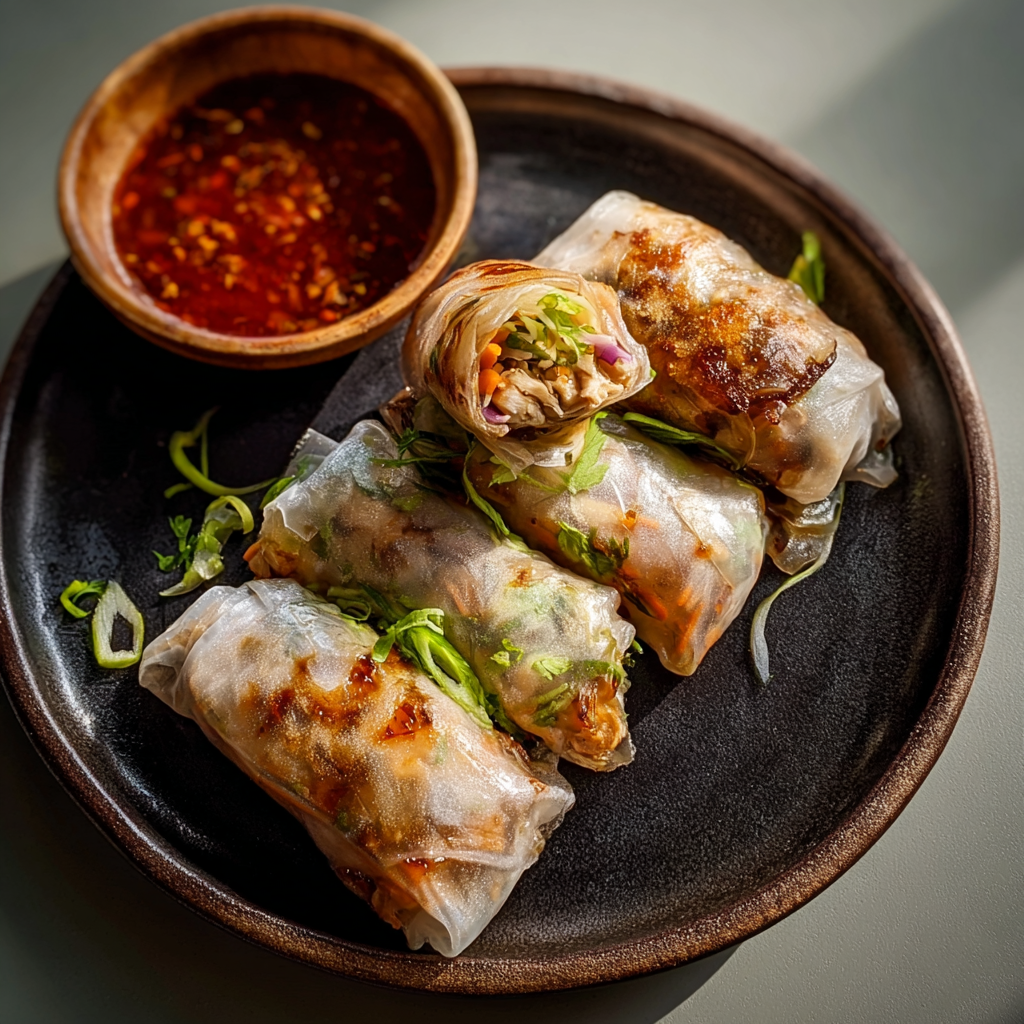
Air-Fried Rice Paper Noodle Rolls
Crispy, light rice paper rolls filled with vermicelli, vegetables and tofu or shrimp, finished in the air fryer for a healthy, snackable treat.
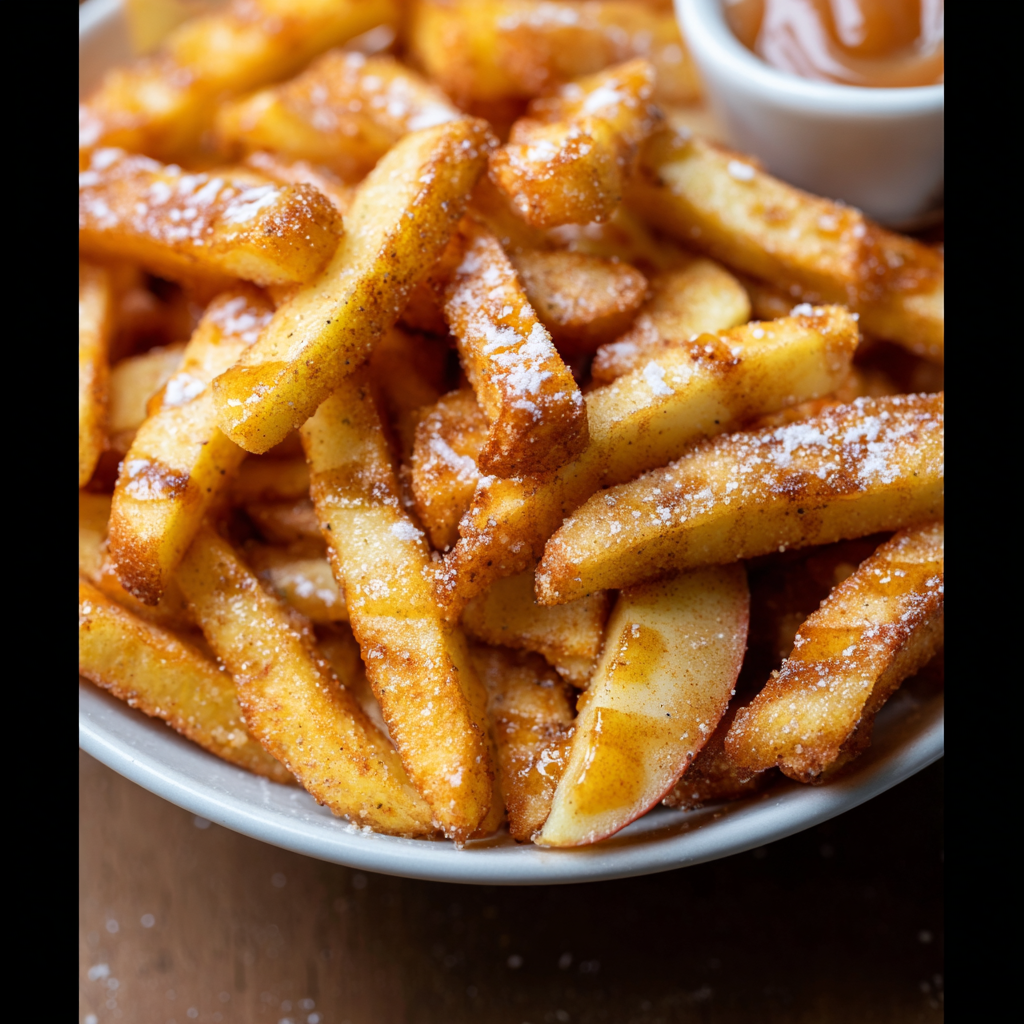
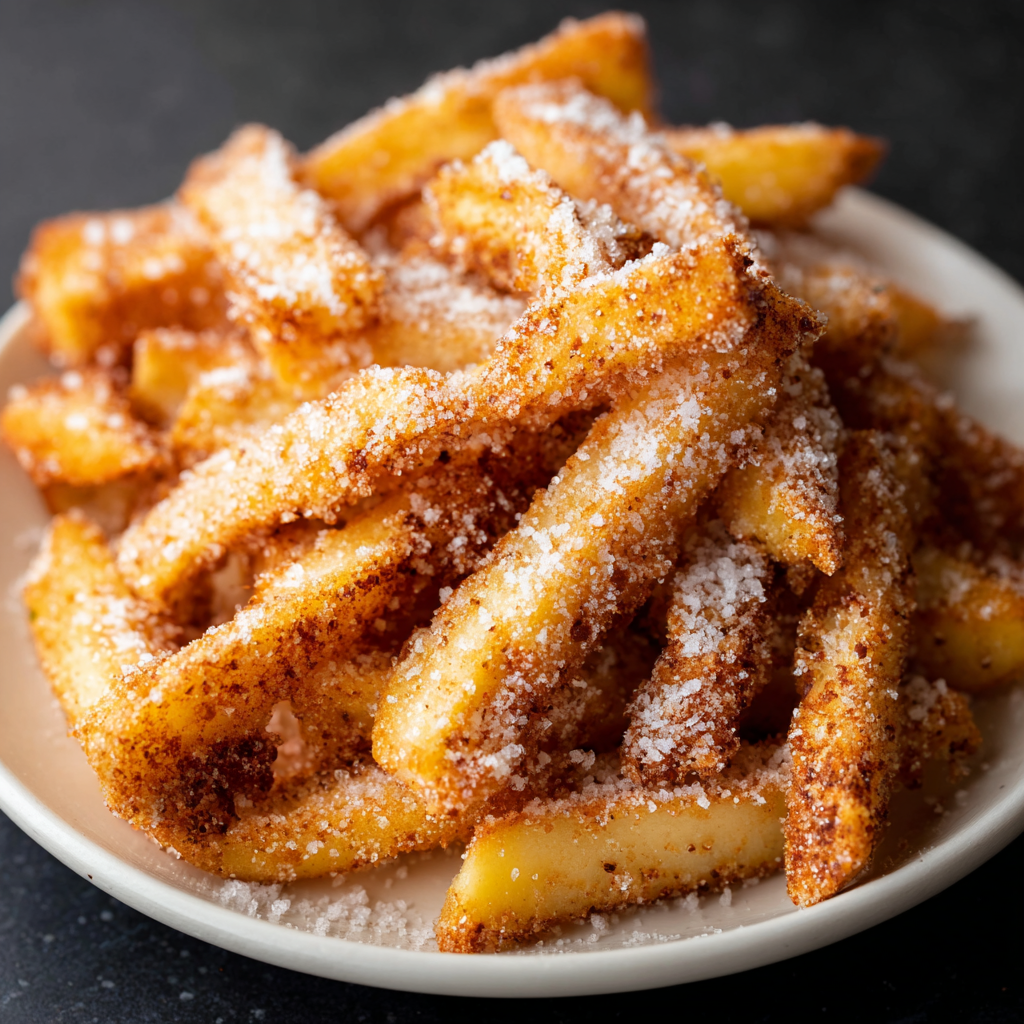
Air Fryer Apple Fries
Crispy, cinnamon-sugar coated apple fries made in the air fryer — a quick, family-friendly snack or dessert ready in under 30 minutes.
Did You Make This?
Leave a comment & rating below or tag @solushcooks on social media!
Rate This Recipe
Share This Recipe
Enjoyed this recipe? Share it with friends and family, and don't forget to leave a review!
Comments (1)
This recipe looks amazing! Can't wait to try it.
Comments are stored locally in your browser. Server comments are displayed alongside your local comments.

Hi, I'm Lena!
What's Popular
30-Minute Meals!
Join to receive our email series which contains a round-up of some of our quick and easy family favorite recipes.