>>

Sweet, translucent orange slices simmered in a simple syrup and dried to a tender, chewy candy — perfect rolled in sugar or dipped in chocolate.

This classic homemade orange candy is the kind of recipe that transforms three humble citrus fruits into a tray of jewel-like treats. I first learned this technique one winter evening while trying to stretch pantry staples and brighten a grey weeknight. The simple chemistry of sugar and citrus peel — patience, low heat, and time — creates a glossy, translucent peel that’s sweet, slightly tart, and luxuriously chewy. It’s become my go-to gift for neighbors and a quiet pleasure I make when I want something special without complicated pastry work.
I remember the first time I presented a bowl of these at a family gathering; the bright orange color stopped conversations mid-sentence. The texture balances between soft candied peel and the delicate chew of a good fruit candy, with the interior orange slice retaining a hint of fresh citrus aroma. These are forgiving to make, require only a few ingredients, and reward patience with vibrant flavor and beautiful presentation. If you enjoy small, handcrafted confections that show off seasonal citrus, this is a recipe you’ll return to again and again.
I first made these during a cold week when citrus was at its peak. Family members took one bite and immediately asked how long I’d been candying fruit. A neighbor loved them so much she requested a second batch for a party. Over time I learned to watch for translucence in the peel as the true sign of doneness and to be gentle when turning slices so they keep their shape. Those small discoveries make each batch better than the last.

My favorite part of making these is the quiet patience it requires. While the syrup simmers, I clean up and prep finishing bowls. After drying, the first slice feels like a small celebration — bright, sweet, and concentrated orange. Friends who’ve received these as gifts often tell me the candy lasts only a few days in their homes because everyone sneaks them from the jar.

After the slices are tacky but set, store them in a single layer or separated by parchment to prevent sticking. Use airtight containers or glass jars, and keep them in a cool, dry place away from direct sunlight. If you need longer storage, arrange slices in a single layer on a baking sheet and freeze until solid, then transfer to a freezer-safe bag for up to three months. Thaw at room temperature before serving. If slices soften over time, a brief 10–15 minute oven stint at 200°F (95°C) on a rack can revive texture — watch closely so they don’t over-dry.
If oranges aren’t in season, try using blood oranges, grapefruit, or lemons, adjusting simmer time for thicker peels. For grapefruit, increase simmer time slightly to fully soften the thicker pith. Swap part of the granulated sugar for brown sugar for a deeper, caramel note — but note that brown sugar may darken the final color. If you prefer a lighter syrup, reduce sugar by 1/2 cup and extend simmer time; the texture will be chewier. For a vegan-friendly assurance, use sugar labeled as unrefined or organic if you avoid bone-char processed sugar.
Present these on a small platter dusted with powdered sugar, or pair them with dark chocolate squares and whole roasted nuts for a dessert board. They make delightful garnishes for cocktails, adorning citrus-forward drinks or hot toddies. For breakfast, chop a slice finely and sprinkle over toasted yogurt and granola to add a sweet, chewy citrus accent. For gift-giving, stack slices in small tins with parchment layers and tie with twine for a rustic look.
Candying fruit is an age-old preservation technique with roots across Europe and the Mediterranean, where sugar became the preferred method to preserve seasonal fruit. Candied citrus peel shows up in many traditions, from Italian panettone to French confitures and British Christmas cakes. The process concentrates flavor and extends shelf life, turning bright fruit into a sweet, shelf-stable treat. This simple method ties modern kitchens to centuries of sweet-making craft.
In winter, use blood oranges or tangelos for deep color and festive presentation. In spring, lemon or lime slices become lively, tart candies. For holidays, dip edges in tempered dark chocolate and dust with edible gold or crushed pistachio for an elegant touch. During warm months, allow drying to occur in the coolest part of the house or use a fan over the rack to prevent stickiness from humidity.
Batch-make these when citrus is at peak and freeze the finished slices in flat layers. Prepare multiple pans and dry them on racks so you have several dozen on hand for gifts or last-minute desserts. Label containers with the date and variety. To speed up active time during a busy week, slice and prepare the syrup in the evening, add the fruit to simmer first thing in the morning, and let slices dry while you work.
Making these orange candies is as much about the process as the end result. The glowing slices are small rewards for a little patience, and sharing them feels like handing someone a bright, homemade jewel. Try a batch this season and make the recipe your own by experimenting with finishes and citrus varieties — the results are always delightfully fragrant and sweet.
Slice oranges uniformly at 1/4-inch thickness for even cooking and consistent texture.
Use a gentle simmer rather than a rolling boil to prevent the syrup from over-concentrating and toughening the peel.
Dry candies in a low-humidity room; flip once during drying to ensure even set and prevent sticking.
If slices stick during drying, separate gently with a thin spatula and allow more air circulation.
This nourishing classic homemade orange candy recipe is sure to be a staple in your kitchen. Enjoy every moist, high protein slice — it is perfect for breakfast or as a wholesome snack any time.
This Classic Homemade Orange Candy recipe makes perfectly juicy, tender, and flavorful steak every time! Serve with potatoes and a side salad for an unforgettable dinner in under 30 minutes.
Slice each orange into uniform 1/4-inch rounds using a sharp knife or mandoline. Remove any seeds and set slices aside on a clean surface.
Combine 3 cups granulated sugar and 3 cups water in a medium saucepan. Stir over medium heat until the sugar dissolves, then bring to a gentle simmer.
Arrange slices in a single layer in the simmering syrup. Simmer gently for 45–60 minutes, turning occasionally, until the peel becomes translucent and slices are glossy.
Transfer slices to a wire rack set over a baking sheet, spacing them apart. Dry uncovered at room temperature for 24–48 hours until tacky but set.
Optionally roll in granulated sugar or dip in melted chocolate. Store in an airtight container at room temperature for up to two weeks or freeze for longer storage.
Last Step: Please leave a rating and comment letting us know how you liked this recipe! This helps our business to thrive and continue providing free, high-quality recipes for you.
Leave a comment & rating below or tag
@solushcooks on social media!

Crispy, golden pockets of melted mozzarella and pepperoni made in the air fryer for a quick party snack or weeknight treat.

Crispy, light rice paper rolls filled with vermicelli, vegetables and tofu or shrimp, finished in the air fryer for a healthy, snackable treat.
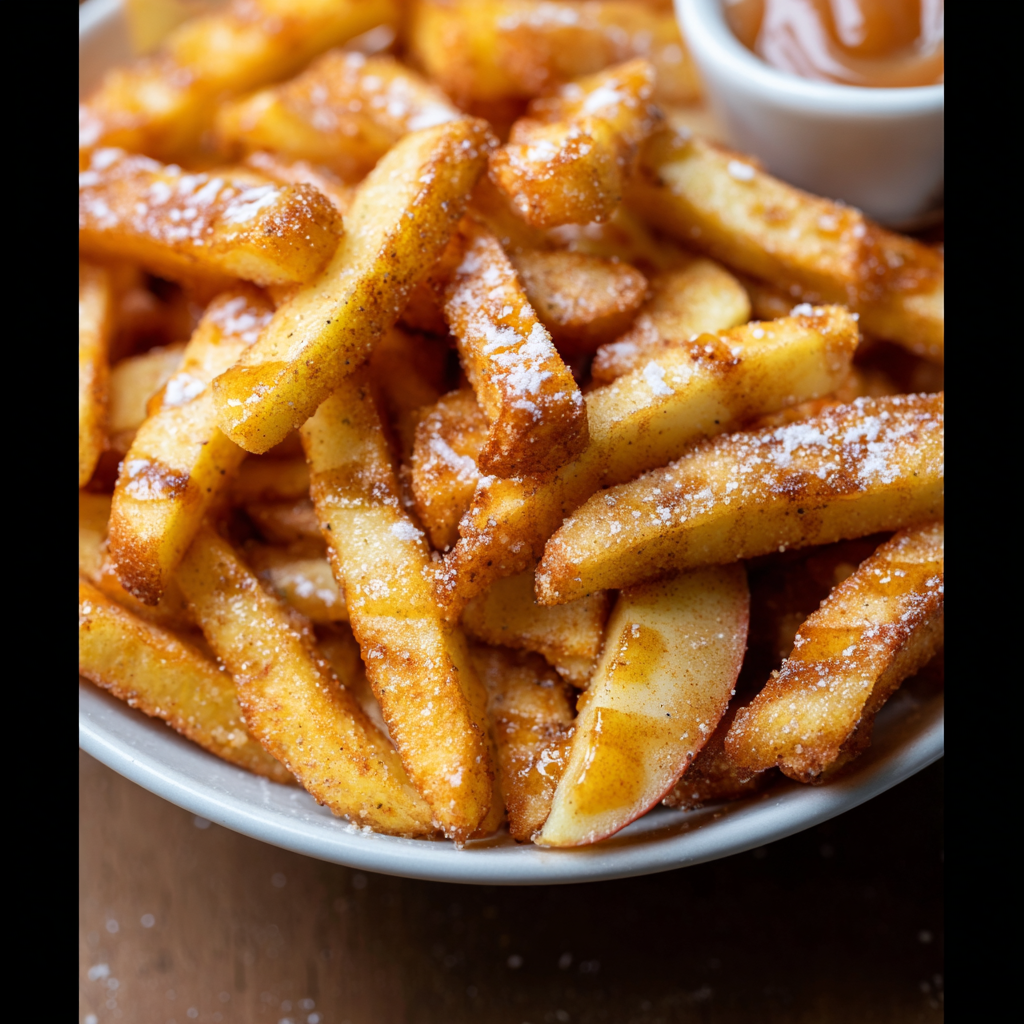
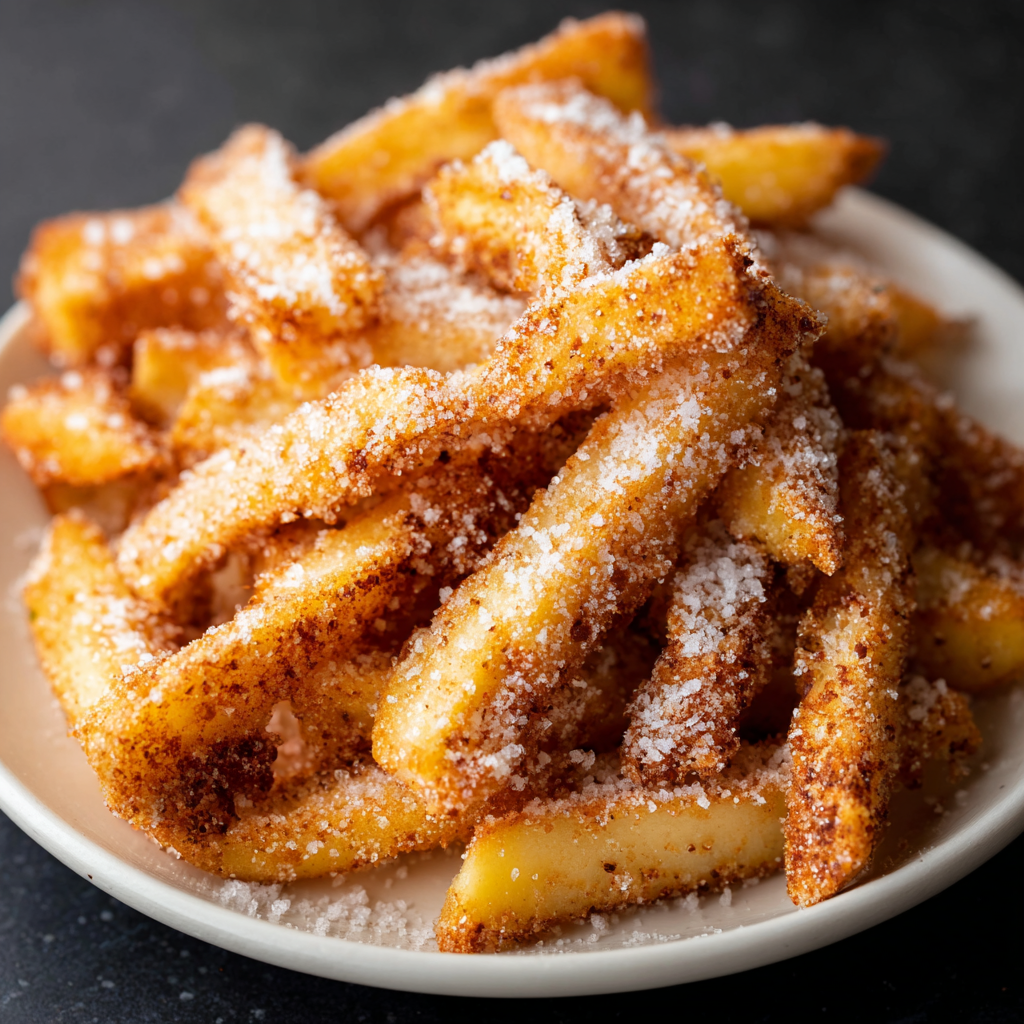
Crispy, cinnamon-sugar coated apple fries made in the air fryer — a quick, family-friendly snack or dessert ready in under 30 minutes.
Leave a comment & rating below or tag @solushcooks on social media!
Enjoyed this recipe? Share it with friends and family, and don't forget to leave a review!
This recipe looks amazing! Can't wait to try it.
Comments are stored locally in your browser. Server comments are displayed alongside your local comments.

Join to receive our email series which contains a round-up of some of our quick and easy family favorite recipes.