
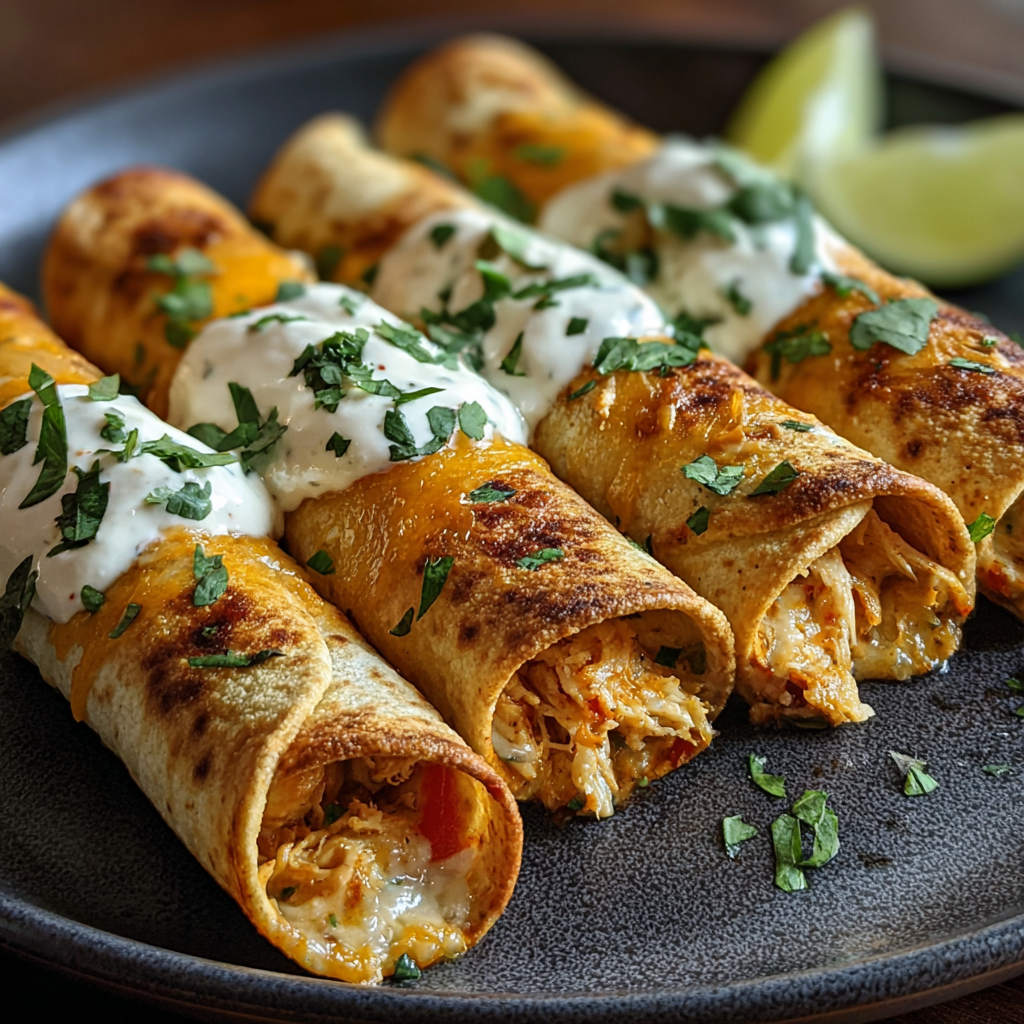
Crispy Chicken Taquitos

Golden-baked chicken taquitos filled with creamy, spiced shredded chicken — perfect for weeknight dinners, parties, or lunchboxes.

This recipe for crispy chicken taquitos has been in heavy rotation at my house since the first brisk autumn evening I assembled them for a casual get-together. I discovered the magic of combining shredded rotisserie chicken with a touch of cream cheese and bold spices one rainy weekend when I wanted something fast, flavorful, and portable. What I love most is how the filling stays moist and flavorful while the tortilla becomes impossibly crisp in the oven. They are simple enough for a weeknight meal yet impressive enough for a crowd.
Every bite balances creamy tang from the softened cream cheese with the smoky warmth of chili powder and cumin, and a little salsa brightens everything. The outside achieves a satisfying crunch without deep-frying, which was a revelation the first time I baked them on a hot sheet and finished them under the broiler for a minute. My family calls these the ultimate comfort appetizer and my friends keep asking for the recipe at every potluck.
Why You'll Love This Recipe
- Ready in about 30 minutes from start to finish, perfect for busy weeknights or last-minute guests.
- Uses pantry staples and an easy shortcut: store-bought rotisserie chicken saves time while keeping the filling flavorful.
- Bakes instead of frying, so you get golden, crispy taquitos with less oil and cleanup.
- Highly adaptable: swap tortillas, cheeses, or spices to suit dietary needs or what you have on hand.
- Great make-ahead option — assemble earlier in the day and bake when guests arrive, or freeze before baking for easy future meals.
In my kitchen these taquitos are the ultimate crowd-pleaser. My neighborhood book club devoured a tray in minutes, and I learned that broiling for 60 to 90 seconds at the end makes the shells sing with crispness. Over time I honed a few tricks — warm the tortillas briefly so they roll without cracking and always place them seam-side down for the cleanest finish.
Ingredients
- Cooked shredded chicken (2 cups): Rotisserie chicken is my go-to because it is juicy and well-seasoned; remove skin and shred with forks for even texture. If using leftover roasted chicken, aim for about 10 to 12 ounces cooked and shred finely so it packs neatly into tortillas.
- Cream cheese (4 ounces): Use full-fat block cream cheese like Philadelphia for binding and creaminess; soften at room temperature for easier mixing and smoother filling.
- Shredded cheddar or Mexican blend (1/2 cup): A sharper cheddar brings tang; a Mexican blend adds melty texture. Pre-shredded cheese is convenient, but freshly shredded melts better.
- Salsa (1/4 cup): Choose mild or spicy depending on preference. A chunky style adds texture; salsa verde gives a brighter, tangy profile.
- Spices: 1/2 teaspoon each garlic powder, chili powder and cumin — these create smoky, aromatic depth. Add a pinch more if you like heat.
- Salt and black pepper: Season to taste; about 1/4 teaspoon salt is a good starting point when using rotisserie chicken.
- Tortillas (8 small): Small flour or corn tortillas both work; flour crisps slightly more while corn gives a traditional flavor. Warm tortillas briefly to prevent cracking when rolling.
- Cooking spray or oil: Use a neutral oil for brushing or an oil spray to promote even browning and an extra-crispy shell.
Instructions
Prepare the oven and pan:Preheat the oven to 425 degrees Fahrenheit. Line a baking sheet with parchment paper or a silicone mat and, if you have one, place an oven-safe wire rack on the sheet for airflow and extra crispness. If you prefer direct contact crisping, skip the rack and brush the tortillas with oil directly on the sheet.Mix the filling:In a large bowl, combine 2 cups cooked shredded chicken, 4 ounces softened cream cheese, 1/2 cup shredded cheese, 1/4 cup salsa, 1/2 teaspoon garlic powder, 1/2 teaspoon chili powder, 1/2 teaspoon ground cumin, and salt and black pepper to taste. Use a fork or spatula to mash the cream cheese into the chicken until evenly coated; the mixture should be moist but not runny. Taste and adjust seasoning.Warm and fill tortillas:Warm tortillas in the microwave covered with a damp paper towel for about 15 to 20 seconds to make them pliable. Place about 2 to 3 tablespoons of filling on one side of each tortilla, spread into a line, and roll tightly. Work briskly so the tortillas remain warm and flexible.Arrange and oil:Place each rolled taquito seam-side down on the prepared baking sheet or rack. Lightly brush with oil or spray with cooking spray to encourage even browning. Leave a small gap between rolls for hot air circulation.Bake and finish:Bake at 425 F for 15 to 20 minutes until golden brown and crisp. For an extra-crispy finish, broil on high for 1 to 2 minutes, watching closely to avoid burning. Remove and rest for 2 minutes before serving so the filling firms up slightly.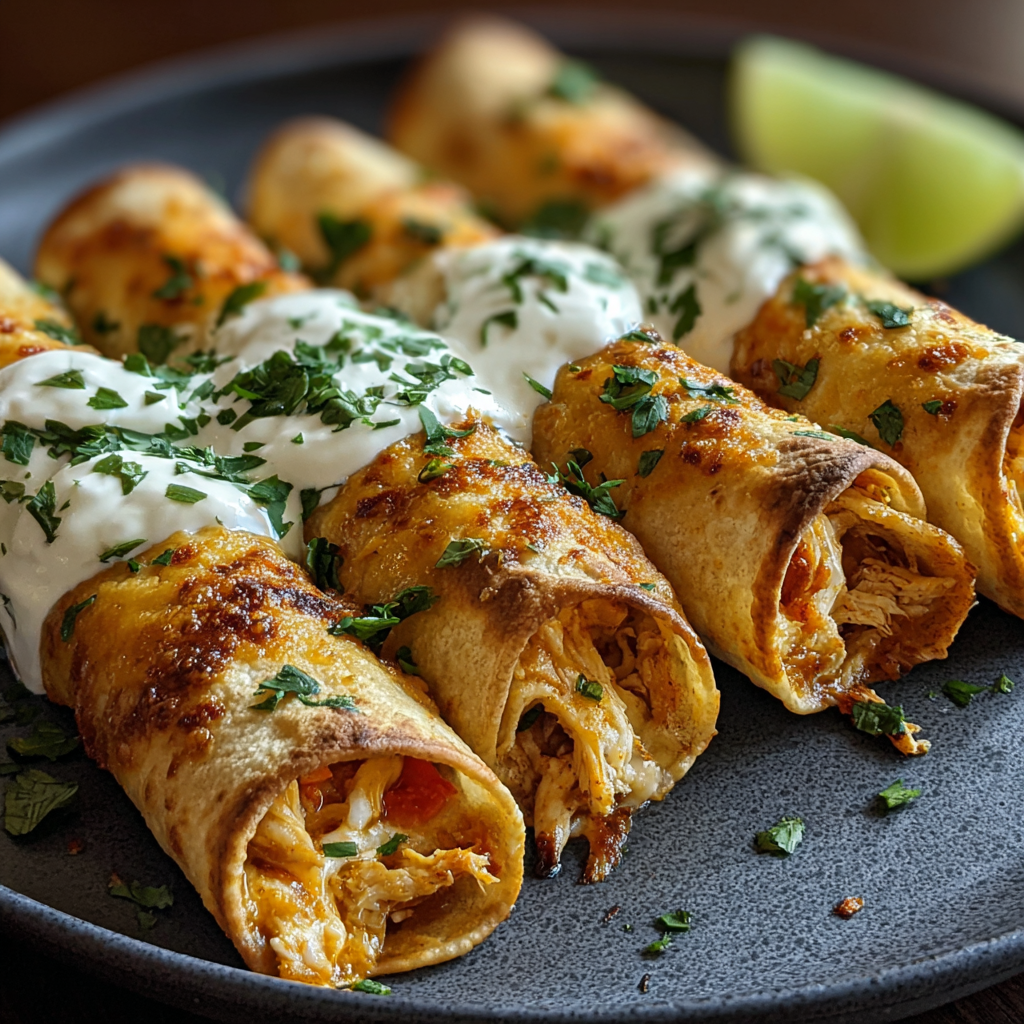
You Must Know
- These keep well in the refrigerator for up to 3 days in an airtight container and reheat in a 375 F oven for 8 to 10 minutes to regain crispness.
- Taquitos freeze beautifully: freeze unbaked on a tray, then transfer to a freezer bag for up to 3 months; bake from frozen adding 5 to 8 minutes to the bake time.
- High in protein thanks to the chicken; watch portions if you are tracking calories because cheese and oil add fat and calories quickly.
- To make truly gluten-free, use small corn tortillas labeled gluten-free and confirm your salsa and spices have no cross-contamination warnings.
My favorite thing about this method is how reliably it produces crisp shells without deep frying; even picky kids who usually avoid baked snacks happily crunch these. Once, I pre-assembled a double batch before a soccer tournament and parents kept circling back for more — it's a dependable, low-stress option for feed-a-crowd moments.
Storage Tips
Store cooled taquitos in an airtight container in the refrigerator for up to 3 days. For maximum crispness on reheating, place them on a baking sheet in a preheated 375 F oven for 8 to 10 minutes, then broil for 30 to 60 seconds if desired. If freezing, freeze unbaked taquitos on a tray until solid, then transfer to a freezer bag. Bake from frozen at 425 F for 20 to 25 minutes, flipping once halfway through for even browning. Avoid storing in a sealed container while still warm to prevent sogginess.
Ingredient Substitutions
If you need to swap ingredients, try Greek yogurt thinned with a little lime juice in place of cream cheese for a tangy, lighter filling — use about 1/3 cup Greek yogurt plus 1 tablespoon cream cheese for structure. For dairy-free, use a vegan cream cheese and a dairy-free shredded cheese alternative; texture will be slightly different but still tasty. Shredded rotisserie turkey works in place of chicken, and canned green chiles or chipotle in adobo can replace salsa for a smokier profile. If corn tortillas crack, warm them a touch longer or wrap in a clean kitchen towel while heating.
Serving Suggestions
Serve hot with bowls of sour cream, guacamole, chopped cilantro, lime wedges, and extra shredded cheese. For a party platter, add pickled red onions, sliced jalapeños, and a simple cabbage slaw dressed with lime and a pinch of sugar. They pair well with Mexican rice or a crisp green salad for a more complete meal. Garnish with a sprinkle of crumbled queso fresco for an authentic touch.
Cultural Background
Taquitos are a handheld favorite often associated with Mexican and Tex-Mex cooking; the word literally means "small tacos." Rolled and fried versions trace back to street food traditions and family kitchens where leftovers were transformed into portable snacks. Baking is a modern adaptation that preserves the essence of the classic while making it more approachable for home cooks who prefer lighter techniques. Regional variations include flautas, which are generally longer and sometimes fried until extra-crisp.
Seasonal Adaptations
Adjust the filling seasonally: in summer add grilled corn and diced roasted peppers for brightness; in fall incorporate diced roasted sweet potato and smoked paprika for earthiness. Around holidays, swap in leftover Thanksgiving turkey and add a spoon of cranberry salsa for a festive twist. Herbs like cilantro or scallions can be switched out for chives or parsley when cilantro is out of season.
Meal Prep Tips
For efficient meal prep, mix the filling and store it in an airtight container in the fridge for up to 2 days. Warm tortillas and assemble taquitos on a tray, cover tightly, and bake when ready. For grab-and-go lunches, bake a double batch and freeze individually wrapped portions; reheat in the oven or air fryer to restore crispness. Label freezer bags with baking instructions so reheating is foolproof later.
These taquitos are the kind of recipe that rewards small refinements: try different salsas, test a minute or two under the broiler for perfect color, and adjust spice levels to your household preferences. Whenever I make them for company, the tray disappears fast — and that simple pleasure is why I keep making them.
Pro Tips
Warm tortillas briefly before rolling to prevent cracking and ensure a tight roll.
Use a wire rack on the baking sheet to allow air circulation and extra-crispy shells.
To freeze, arrange unbaked taquitos on a tray until solid, then transfer to a freezer bag and bake from frozen adding 5 to 8 minutes.
This nourishing crispy chicken taquitos recipe is sure to be a staple in your kitchen. Enjoy every moist, high protein slice — it is perfect for breakfast or as a wholesome snack any time.
Tags
Crispy Chicken Taquitos
This Crispy Chicken Taquitos recipe makes perfectly juicy, tender, and flavorful steak every time! Serve with potatoes and a side salad for an unforgettable dinner in under 30 minutes.
Ingredients
Filling
Assembly
Optional Toppings
Instructions
Preheat and prepare sheet
Preheat the oven to 425 degrees Fahrenheit. Line a baking sheet with parchment paper and, if using, set an oven-safe wire rack on the sheet to promote airflow and even browning.
Combine filling
In a large bowl combine shredded chicken, softened cream cheese, shredded cheese, salsa, garlic powder, chili powder, cumin, and salt and pepper. Mash together until cohesive; the mixture should be moist enough to hold shape but not watery.
Warm and fill tortillas
Warm tortillas in the microwave for 15 to 20 seconds wrapped in a damp paper towel to make them pliable. Spoon 2 to 3 tablespoons of filling near one edge of each tortilla and roll tightly.
Arrange on sheet and oil
Place each taquito seam-side down on the prepared baking sheet. Lightly brush with oil or spray with cooking spray to encourage even browning and a crisp finish.
Bake and broil if desired
Bake at 425 F for 15 to 20 minutes until golden and crisp. For an extra-crisp exterior, broil for 1 to 2 minutes at the end, watching closely to prevent burning. Let rest 1 to 2 minutes before serving.
Last Step: Please leave a rating and comment letting us know how you liked this recipe! This helps our business to thrive and continue providing free, high-quality recipes for you.
Nutrition
Did You Make This?
Leave a comment & rating below or tag
@solushcooks on social media!
Categories:
You might also like...
Air-Fried Pizza Rolls
Crispy, golden pockets of melted mozzarella and pepperoni made in the air fryer for a quick party snack or weeknight treat.
Air-Fried Rice Paper Noodle Rolls
Crispy, light rice paper rolls filled with vermicelli, vegetables and tofu or shrimp, finished in the air fryer for a healthy, snackable treat.
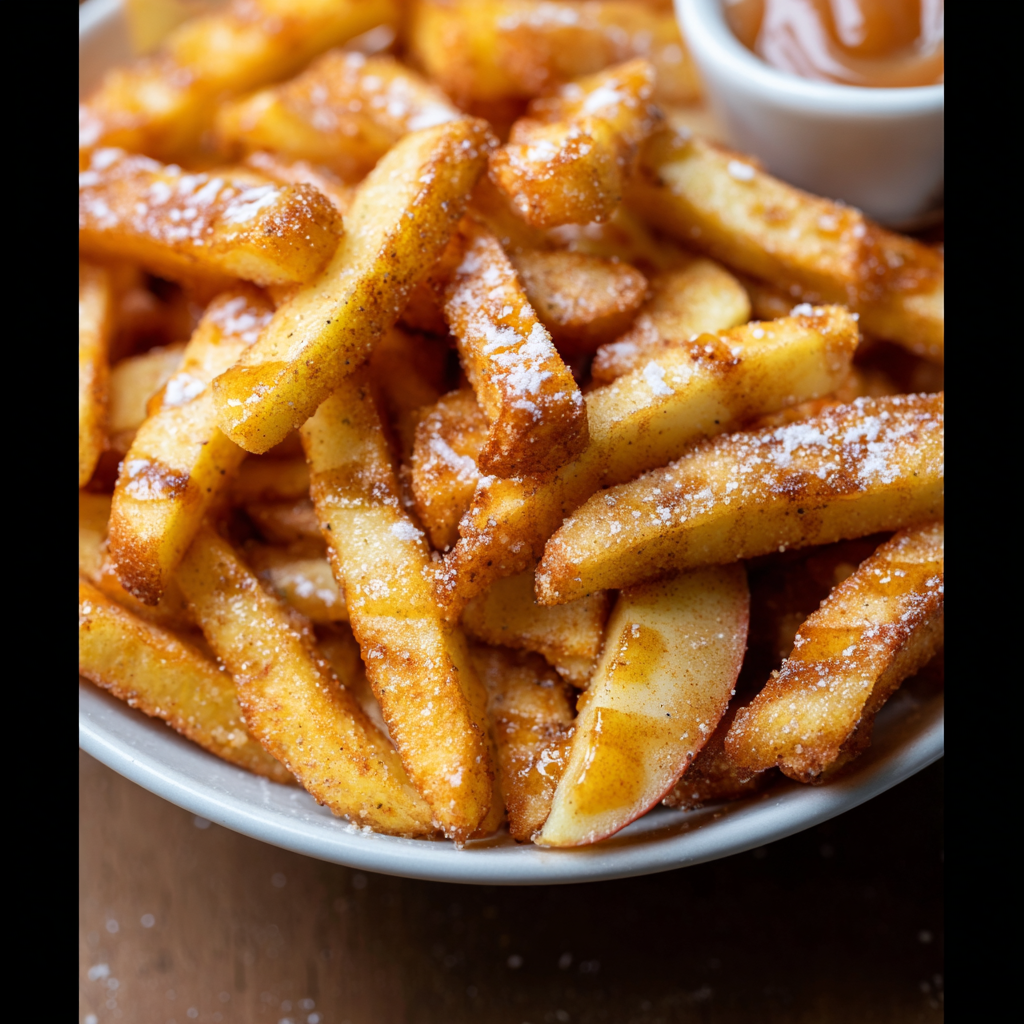
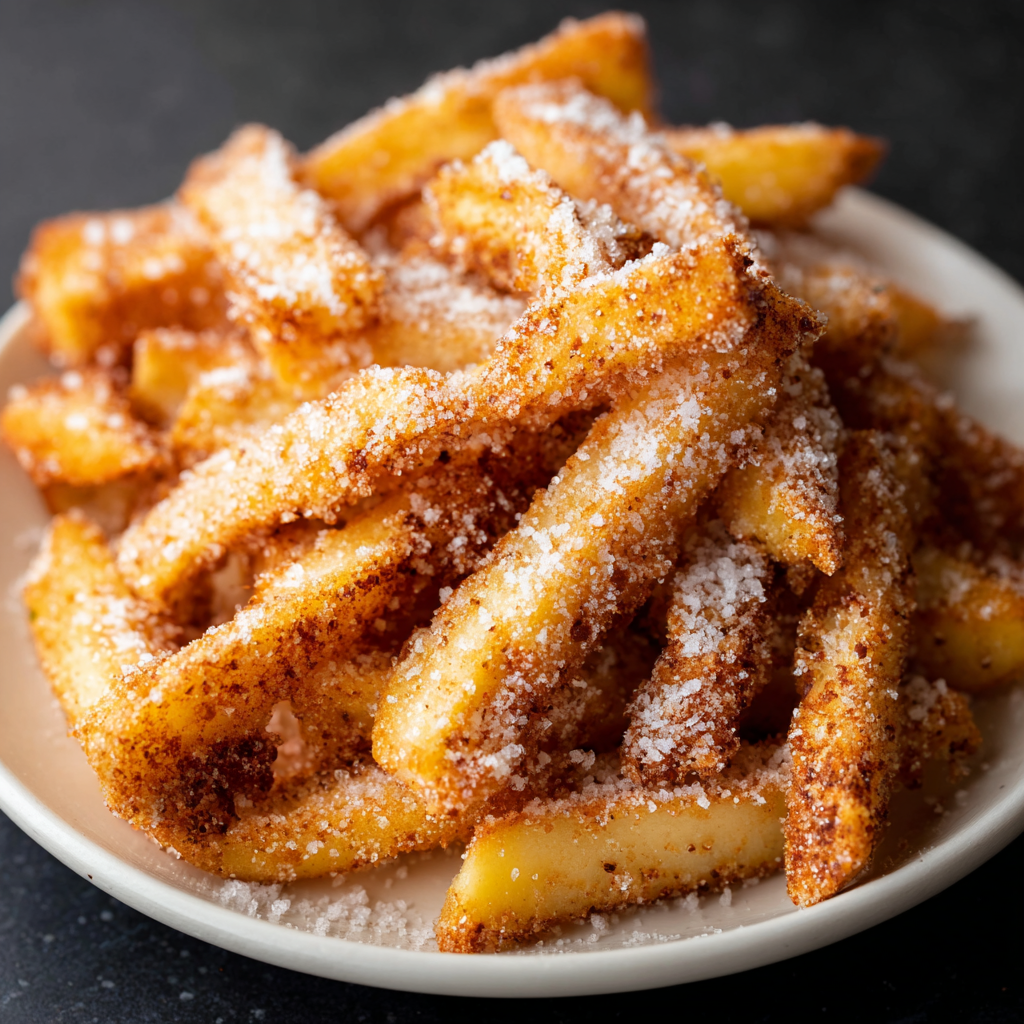
Air Fryer Apple Fries
Crispy, cinnamon-sugar coated apple fries made in the air fryer — a quick, family-friendly snack or dessert ready in under 30 minutes.
Did You Make This?
Leave a comment & rating below or tag @solushcooks on social media!
Rate This Recipe
Share This Recipe
Enjoyed this recipe? Share it with friends and family, and don't forget to leave a review!
Comments (1)
This recipe looks amazing! Can't wait to try it.
Comments are stored locally in your browser. Server comments are displayed alongside your local comments.

Hi, I'm Lena!
What's Popular
30-Minute Meals!
Join to receive our email series which contains a round-up of some of our quick and easy family favorite recipes.