>>

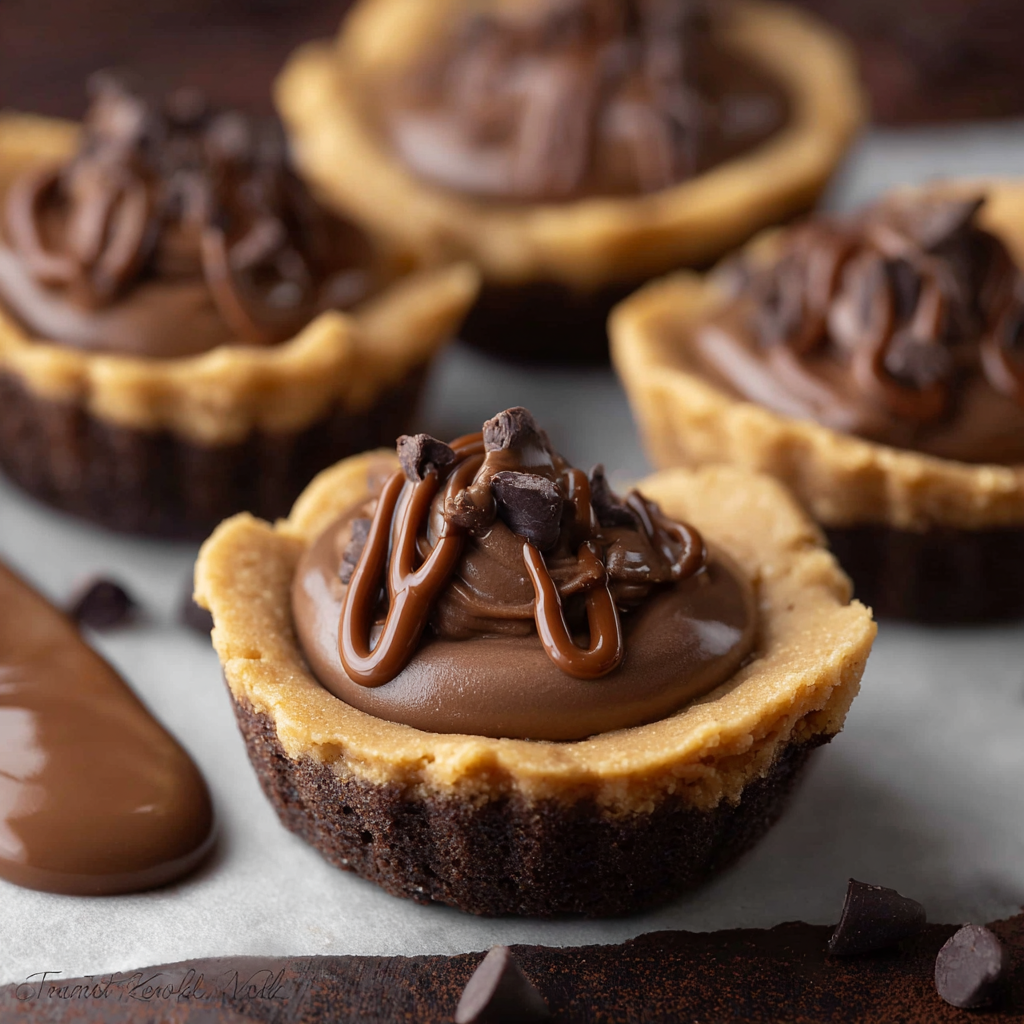
Chocolate lined cookie cups filled with a creamy peanut butter center and a glossy semisweet topping. A nostalgic treat that is easy to make and impossible to resist.

This recipe for Fudge Puddles first came into my life on a quiet Saturday afternoon when I was craving something chocolate and nostalgic but did not want to spend hours baking. I adapted a classic peanut butter cookie cup by adding a fudgy semisweet topping made with sweetened condensed milk. The result is a small indulgence that balances a tender, buttery cookie shell with a creamy peanut butter center and a glossy chocolate crown. I discovered it by combining pantry staples and a little improvisation. Since then these cups have been a staple for potlucks and after school snacks in my house.
What makes these cookie cups special is the contrast in textures and the straight forward method. The cookie base is slightly crisp at the edges and soft toward the center, the peanut butter filling is smooth and not grainy, and the chocolate top sets to a satiny finish that gives a nice snap when you bite in. They are great warm or at room temperature and they travel well. I began making a batch almost every week because friends and family always ask for more. The recipe is forgiving which makes it perfect when you are baking for a crowd or experimenting with flavors.
My family’s reaction the first time I served these was instant approval. My children loved helping press the dough into the tins and the adults appreciated the nostalgic combination of peanut butter and chocolate. Over time I learned small tweaks that improve texture and flavor which I share below.
My favorite part is watching people break one in half and reveal the creamy peanut butter center. At holiday parties they disappear first because the small size makes them irresistible. I have learned that pressing the dough evenly into the tin is the key to consistent results so I always measure portions by tablespoon and do a quick visual check before baking.

To maintain texture keep the cookie cups in a single layer in an airtight container. If stacking place a layer of parchment paper between layers to prevent the chocolate topping from sticking. For short term storage leave them at room temperature away from direct sunlight for up to two days. For longer storage refrigerate for up to one week and bring to room temperature before serving for best flavor. To freeze wrap each item tightly in plastic wrap and place in a freezer safe bag. Thaw in the refrigerator overnight then sit at room temperature for 30 minutes before serving.
For a nuttier profile swap smooth peanut butter for crunchy peanut butter using the same volume. If you need a dairy free option use dairy free chocolate chips and a coconut condensed milk alternative and choose a suitable plant based butter for the dough. To make them gluten free replace the all purpose flour with a 1 to 1 gluten free flour blend and add a teaspoon of xanthan gum if your blend does not already include it. Using natural peanut butter will change the texture because natural oils separate so reduce other liquids and stir well before measuring.
Serve these cookie cups at room temperature on a simple platter garnished with a light sprinkle of flaky sea salt or finely chopped roasted peanuts for contrast. They pair beautifully with a glass of cold milk or espresso for after dinner. For party presentation place them in paper liners and arrange on a tiered serving stand to make them easy to pick up. For a festive touch drizzle melted white chocolate across the top or add a small toasted marshmallow for a campfire vibe.
The combination of peanut butter and chocolate is a classic in American home baking and traces its popularity to post World War II convenience baking when shelf stable ingredients became staples. The use of condensed milk in confections is borrowed from European and Latin techniques where it provides body and sweetness without additional sugar. These miniature cups reflect the American love for handheld desserts and party friendly finger foods that gained traction in community gatherings and potlucks.
In winter add a pinch of ground cinnamon or pumpkin pie spice to the dough for a cozy aroma. For summer lighten the experience by using a milk chocolate top and garnish with chopped strawberries. For holidays consider sprinkling edible gold dust or crushed peppermint on top for a mint chocolate twist. Small seasonal swaps keep the core method unchanged while highlighting familiar flavors.
If you are making a large batch for the week bake all the cups and store them unfilled in the freezer. Thaw and fill when you are ready to serve to preserve the freshness of the peanut butter center. Alternatively make the chocolate filling in advance and gently rewarm to a pourable consistency. Use airtight reusable containers for transport to events and keep a small cooler for long drives to prevent melting.
These petite indulgences are simple to make and full of nostalgic charm. Whether you bake them for a crowd or an afternoon treat they bring a little celebration to the everyday. Try them as written first then experiment with fillings and toppings to make them your own.
Measure portions with a tablespoon for consistent cup size and even baking.
Soften butter at room temperature but do not melt it to maintain a tender crumb.
If the chocolate mixture firms up while assembling warm it gently over a double boiler to return it to pouring consistency.
Rotate the muffin tin halfway through bake time to ensure even coloring and uniform cups.
This nourishing fudge puddles (chocolate peanut butter cookie cups) recipe is sure to be a staple in your kitchen. Enjoy every moist, high protein slice — it is perfect for breakfast or as a wholesome snack any time.
Yes chill the filled cups in the refrigerator for 15 to 20 minutes to speed up setting. They are best at room temperature for eating.
Use one tablespoon to one and a half tablespoons of dough per tin cup for 12 servings. Adjust portions for a mini tin accordingly.
This Fudge Puddles (Chocolate Peanut Butter Cookie Cups) recipe makes perfectly juicy, tender, and flavorful steak every time! Serve with potatoes and a side salad for an unforgettable dinner in under 30 minutes.
Preheat oven to 350 degrees Fahrenheit. Lightly grease a 12 cup muffin tin or use silicone liners. Softening butter while the oven heats helps with creaming.
Cream 1/2 cup butter, 1/2 cup smooth peanut butter, 1/2 cup granulated sugar and 1/2 cup light brown sugar until light and fluffy about 2 to 3 minutes with a mixer. Add 1 large egg and mix until incorporated.
Whisk together 1 1/2 cups flour, 3/4 teaspoon baking soda and 1/2 teaspoon salt. Add to the wet mix in two additions and mix until just combined. Avoid overmixing.
Divide dough into 12 even portions about one tablespoon to one and a half tablespoons each. Press each portion into the muffin tin forming even walls and a small well in the center.
Bake for 10 to 12 minutes until edges are lightly golden and centers set. Rotate the tin halfway through bake time for even color.
Cool in tin for about 8 minutes then ease out cups gently. Cooling briefly in the tin helps preserve shape.
Melt 2 cups semisweet chocolate chips with one 14 ounce can sweetened condensed milk over low heat or in a microwave safe bowl stirring until smooth and glossy. Use a double boiler to avoid scorching.
Place a teaspoon of smooth peanut butter in each cup then top with one tablespoon of the chocolate mixture. Allow to cool at room temperature or chill for 15 to 20 minutes until set.
Last Step: Please leave a rating and comment letting us know how you liked this recipe! This helps our business to thrive and continue providing free, high-quality recipes for you.
Leave a comment & rating below or tag
@solushcooks on social media!
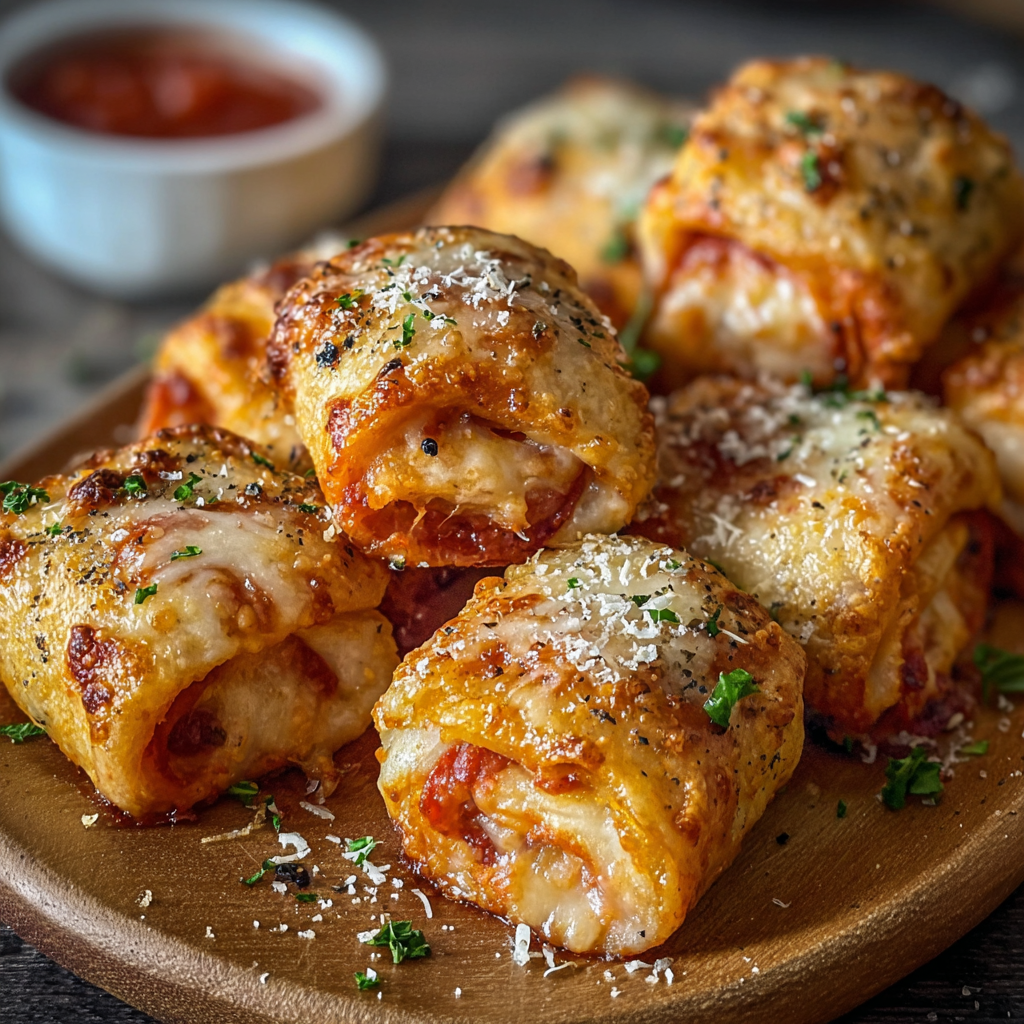
Crispy, golden pockets of melted mozzarella and pepperoni made in the air fryer for a quick party snack or weeknight treat.
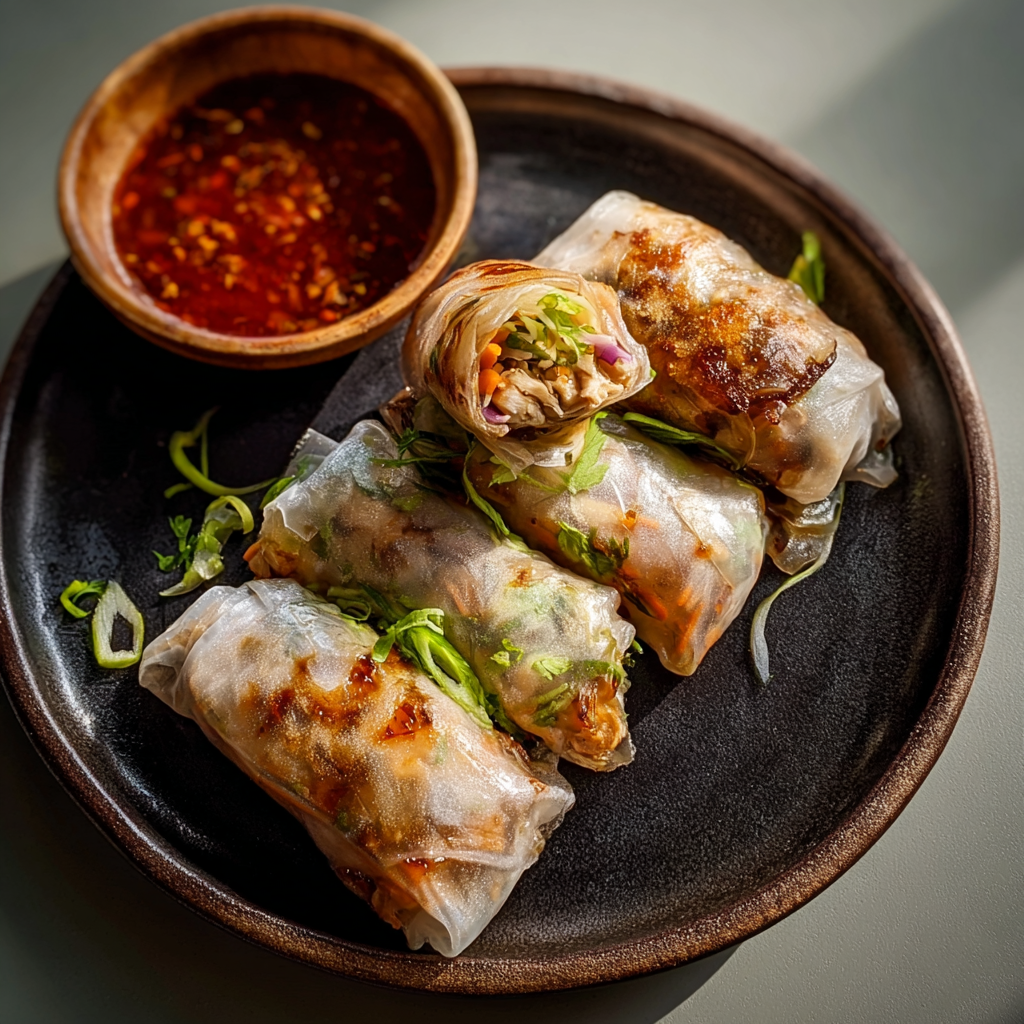
Crispy, light rice paper rolls filled with vermicelli, vegetables and tofu or shrimp, finished in the air fryer for a healthy, snackable treat.
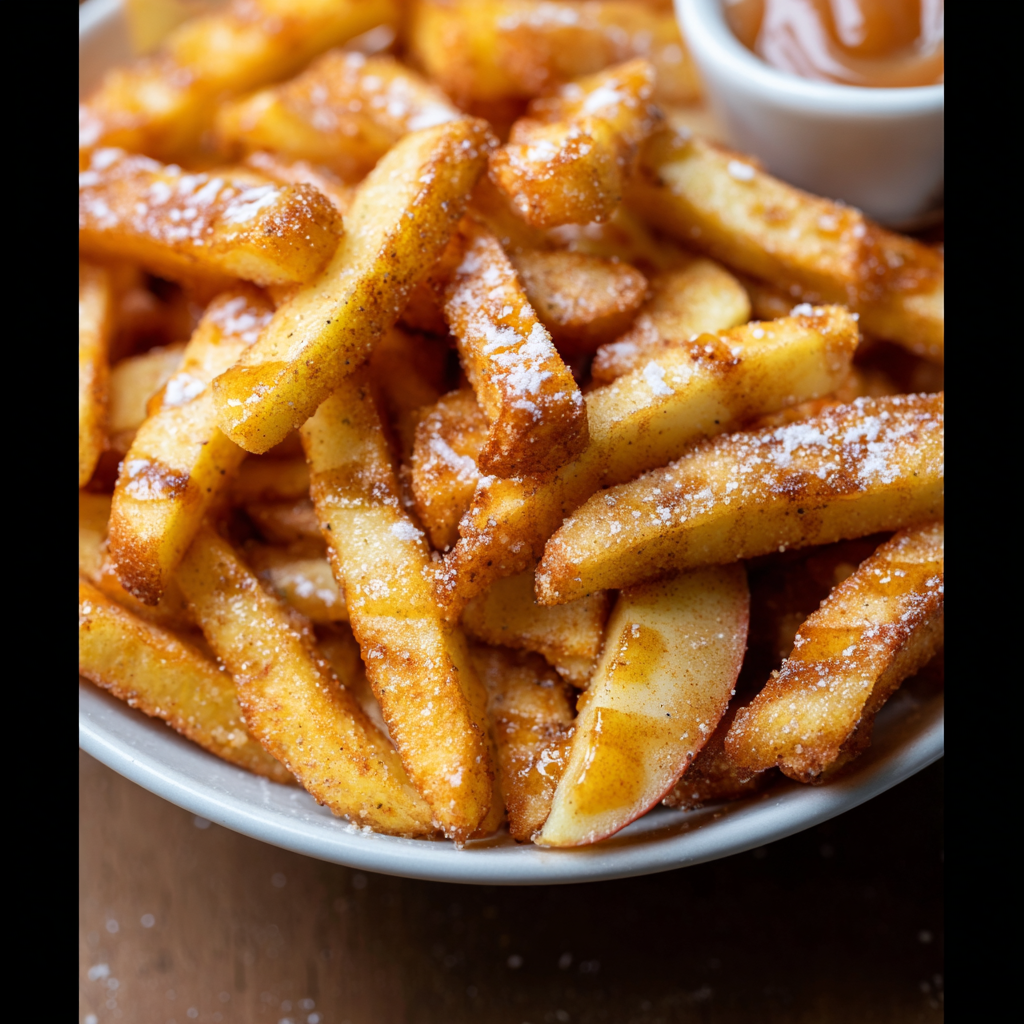
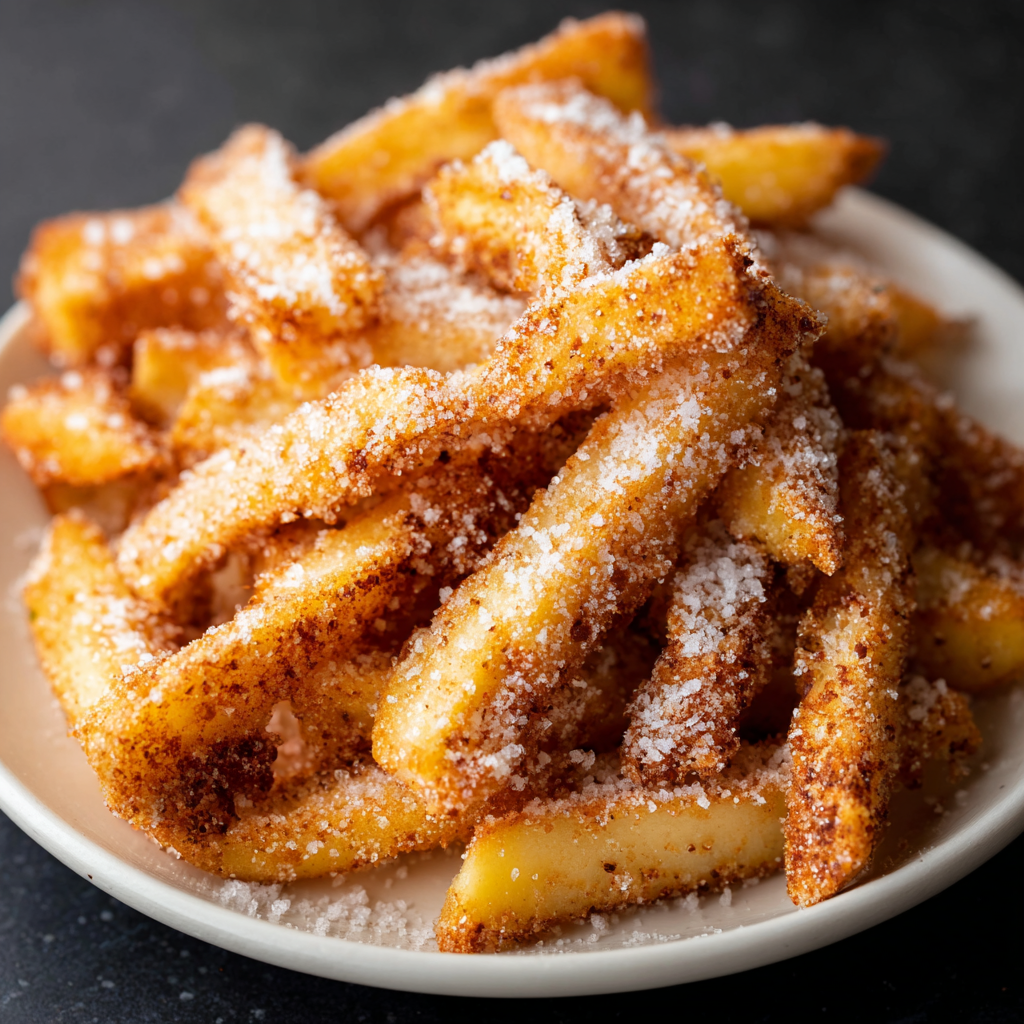
Crispy, cinnamon-sugar coated apple fries made in the air fryer — a quick, family-friendly snack or dessert ready in under 30 minutes.
Leave a comment & rating below or tag @solushcooks on social media!
Enjoyed this recipe? Share it with friends and family, and don't forget to leave a review!
This recipe looks amazing! Can't wait to try it.
Comments are stored locally in your browser. Server comments are displayed alongside your local comments.

Join to receive our email series which contains a round-up of some of our quick and easy family favorite recipes.