
Homemade Cheesy Garlic Breadsticks

Warm, cheesy garlic breadsticks with a tender, slightly chewy dough and a crisp golden crust — perfect for parties, weeknight dinners, or an indulgent snack.
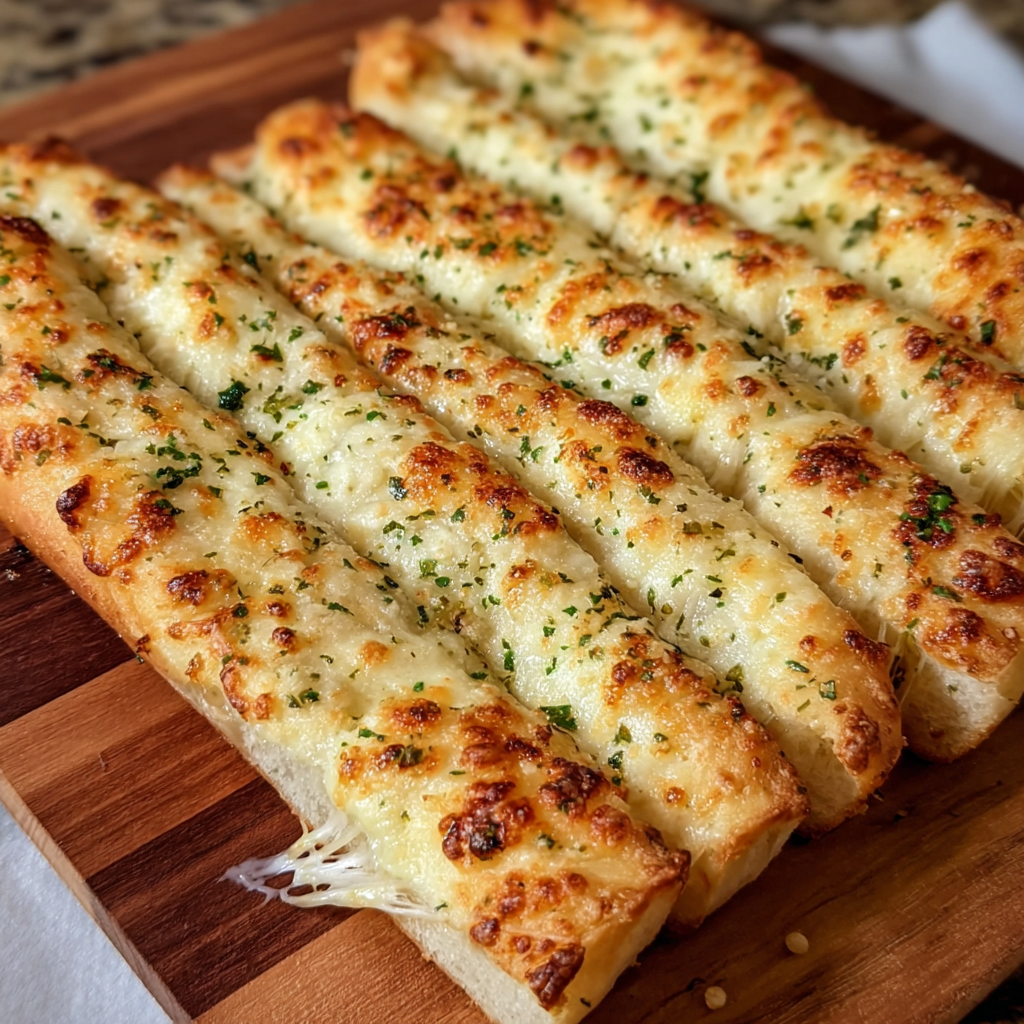
This recipe for homemade cheesy garlic breadsticks has been a weekend favorite in my kitchen for years. I first developed it on a rainy Saturday when I wanted something comforting and shareable that could double as a side and a snack. The result is a soft, slightly chewy interior wrapped in a thin, golden crust, with ribbons of mozzarella and a punch of garlic in every bite. It fills the house with a warm, irresistible aroma that always brings people into the kitchen.
I discovered the balance of textures by accident after overfilling a rolled loaf with cheese; the spiral slices baked into perfectly portioned sticks that were easy to dip and even easier to disappear. These breadsticks are special because they use pantry-friendly ingredients, require minimal hands-on time, and deliver restaurant-style flavor at home. Whether you are serving them with soup, a salad, or as part of a party spread, they consistently earn compliments and second helpings.
Why You'll Love This Recipe
- Ready with just about 20 minutes of active work plus a one-hour rise; perfect for busy evenings when you want something special without fuss.
- Uses simple pantry staples — all-purpose flour, yeast, olive oil, and common cheeses — so you rarely need a special grocery run.
- Make-ahead friendly: dough can be refrigerated overnight to save time and deepen flavor, and finished breadsticks reheat beautifully.
- Crowd-pleasing texture: crisp outside, tender inside, and oozy mozzarella throughout; great for dipping in marinara, ranch, or pesto.
- Customizable: swap cheeses, add herbs, or make smaller sticks for party platters — the technique stays the same.
My family always gathers when these come out of the oven. I remember serving them at a small holiday gathering where guests kept asking for the recipe; they loved the garlicky butter finish and the way the cheese melted into the spiral. Making them feels a bit like a small ritual — rolling, brushing, and slicing — that rewards you with warm, shareable comfort.
Ingredients
- Warm water: Use 1 1/2 cups of water around 105 to 110°F to activate the yeast; too hot will kill the yeast, too cold will slow the rise.
- Active dry yeast: 2 teaspoons of reliable yeast (I use Fleischmann's) for a predictable one-hour rise and light crumb.
- Sugar: 1 teaspoon to feed the yeast and kickstart fermentation for consistent proofing.
- All-purpose flour: 4 cups; King Arthur or similar unbleached flour gives good structure without being too heavy.
- Salt: 2 teaspoons to season the dough and balance the richness of the cheese and butter.
- Olive oil: 4 tablespoons for tenderness and a subtle fruity note; extra virgin works fine for flavor.
- Garlic: 4 cloves, minced fresh; fresh garlic gives the best aroma and bright flavor compared with powder.
- Butter: 2 tablespoons melted to mix with garlic for brushing before and after baking.
- Mozzarella cheese: 2 cups shredded, part-skim or whole-milk depending on desired melt and richness.
- Parmesan cheese: 1/4 cup finely grated for finishing, adding nutty complexity and saltiness.
- Fresh parsley: Chopped for garnish; flat-leaf parsley brightens the finished sticks.
Instructions
Activate the yeast: In a small bowl combine 1 1/2 cups warm water, 2 teaspoons active dry yeast, and 1 teaspoon sugar. Stir gently and let sit for 5 to 10 minutes until frothy and fragrant. If it does not foam, your yeast may be inactive — start over with fresh yeast and slightly warmer water (not over 115°F). Make the dough: In a large bowl whisk together 4 cups all-purpose flour and 2 teaspoons salt. Add the yeast mixture and 4 tablespoons olive oil. Stir until the dough comes together, then knead by hand on a lightly floured surface for 6 to 8 minutes until smooth and elastic. If using a stand mixer, knead with a dough hook on low for 4 to 5 minutes. First rise: Place the dough in a lightly oiled bowl, cover with plastic wrap or a damp towel, and let it rise in a warm spot until doubled in size, about 60 minutes. The dough should spring back slowly when poked; if it collapses, it has over-proofed slightly but will still bake nicely. Prepare garlic butter: Combine 4 cloves minced garlic with 2 tablespoons melted butter in a small bowl. Reserve about 1 tablespoon to brush after baking. This mixture will be used to flavor the surface and the interior of the roll. Roll, fill, and slice: On a lightly floured surface, roll the risen dough into a roughly 12x16-inch rectangle. Brush the surface with most of the garlic butter, then evenly sprinkle 2 cups shredded mozzarella over the top. Roll the dough tightly from the long side into a log, seam-side down. Using a sharp knife, slice into 12 to 16 equal pieces and arrange cut-side up on a parchment-lined baking sheet, leaving space between pieces. Bake: Preheat the oven to 425°F. Bake the breadsticks for 15 to 20 minutes until golden brown and the cheese is bubbling. Small visual cues: the tops should be a deep golden color and the bottoms should sound hollow if tapped lightly. Finish and serve: Immediately brush with the reserved garlic butter, sprinkle 1/4 cup grated Parmesan and chopped fresh parsley over the top, and serve warm. These are best eaten within a couple of hours of baking but reheat well.
You Must Know
- These sticks are best enjoyed warm; they keep well in the refrigerator for up to 3 days and freeze for about 3 months when wrapped tightly.
- High in calcium and protein thanks to the cheese, but also contain gluten and saturated fat — serve with lighter sides to balance a meal.
- Over-kneading can make the crumb too tight; aim for a smooth, slightly tacky dough that springs back when pressed gently.
- Brush with butter immediately after baking to lock in moisture and maximize aroma; the Parmesan adds a sharp finish.
What I love most about these is how forgiving they are: even when I’m short on time I can speed up the rise in a warm oven or refrigerate the dough overnight to bake the next day. Family gatherings always revolve around the platter; kids love pulling apart the cheesy spirals while adults reach for a second stick dipped in marinara.
Storage Tips
Room temperature storage is fine for a few hours, but for longer storage place cooled breadsticks in an airtight container or zip-top bag and refrigerate for up to 3 days. To freeze, wrap individual or small groups tightly in plastic wrap and place in a freezer bag for up to 3 months. Reheat from frozen by baking at 350°F for 10 to 15 minutes, or thaw in the refrigerator overnight and reheat at 375°F for 8 to 10 minutes. Avoid microwaving for long periods because it makes the crust soggy — a quick oven or toaster-oven warm-up preserves texture.
Ingredient Substitutions
If you need variations, substitute bread flour for all-purpose to increase chewiness, or use a mix of fontina and mozzarella for a silkier melt. For a dairy-free option, use a plant-based butter and dairy-free shredded cheese designed for melting, though total flavor and browning will differ. Whole-wheat flour can replace up to half the all-purpose flour; add 1 to 2 extra tablespoons of water if the dough feels dry. Fresh garlic is recommended, but 1/2 teaspoon garlic powder can be used in a pinch — fresh results are brighter.
Serving Suggestions
Serve these with warm marinara, pesto, or a garlicky olive oil dip. For a heartier meal, pair with a Caesar or Italian chopped salad and a bowl of tomato soup. For parties, arrange on a platter with a sprinkle of flaky sea salt and extra chopped parsley; add small ramekins of dipping sauces and roasted red pepper slices for color. They make a delightful side for grilled chicken or meatballs and are a natural addition to any pasta night.

Cultural Background
These cheesy garlic sticks are an American take on Italian bread traditions, blending the classic garlicky flavors found in bruschetta and garlic knots with the pull-apart shape of a stuffed roll. While not a traditional Italian item, they draw on long-standing Mediterranean techniques: olive oil for tenderness, garlic for brightness, and simple cheeses for melt and salt. Over time, American pizzerias and home cooks adapted these influences into the hand-held, cheese-stuffed forms popular at family gatherings.
Seasonal Adaptations
In spring and summer, add finely chopped basil and sundried tomatoes to the cheese layer for a fresher profile. In fall and winter, swap some mozzarella for sharp provolone and a pinch of smoked paprika or add caramelized onions for depth. Holiday variations can include rosemary and sea salt or a topping of toasted pine nuts and thyme. Adjust baking time slightly if you change cheese blends, as higher-fat cheeses brown faster.
Meal Prep Tips
For make-ahead convenience, prepare the dough in the evening and refrigerate it overnight to develop flavor. On the day you plan to serve, roll, fill, slice, and allow a short 20 minute resting period before baking. For single-serve reheating, split into portions and freeze baked sticks; warm in a 350°F oven to restore freshness. Use shallow, vented containers to avoid sogginess when storing multiple layers.
Ultimately, these breadsticks are about generosity — easy to make in batches, effortless to share, and always a warm reminder that good food brings people together. Try making them your own with a favorite cheese or herb and enjoy the smiles they create.
Pro Tips
Measure flour by spooning into the cup and leveling with a knife to avoid dense dough.
Keep water temperature between 105 and 115°F to safely activate yeast without killing it.
Brush with garlic butter right after baking to seal in moisture and aroma.
Use a sharp serrated knife to slice the roll cleanly so cheese doesn't pull unevenly.
This nourishing homemade cheesy garlic breadsticks recipe is sure to be a staple in your kitchen. Enjoy every moist, high protein slice — it is perfect for breakfast or as a wholesome snack any time.
FAQs about Recipes
What if my yeast doesn't foam?
If your yeast does not foam, the yeast is likely inactive. Try again with fresh yeast and ensure water is between 105 and 115°F.
Where should I proof the dough?
Let dough rise in a warm, draft-free spot or in an oven with just the oven light on. Avoid placing near cold windows.
Tags
Homemade Cheesy Garlic Breadsticks
This Homemade Cheesy Garlic Breadsticks recipe makes perfectly juicy, tender, and flavorful steak every time! Serve with potatoes and a side salad for an unforgettable dinner in under 30 minutes.
Ingredients
Dough
Topping & Finish
Instructions
Activate yeast
Combine warm water, yeast, and sugar; let sit 5 to 10 minutes until frothy to confirm yeast is active.
Make and knead dough
Mix flour and salt, add yeast mixture and olive oil. Knead until smooth and elastic, about 6 to 8 minutes by hand.
First rise
Place dough in an oiled bowl, cover, and let rise until doubled, about 60 minutes in a warm spot.
Prepare garlic butter
Mix minced garlic with melted butter, reserving a small amount to brush after baking for extra gloss and flavor.
Shape and fill
Roll dough into a rectangle, brush with garlic butter, sprinkle with mozzarella, roll tightly, slice into 12-16 pieces, and arrange on a parchment-lined sheet.
Bake
Bake at 425°F for 15 to 20 minutes until golden brown and cheese is bubbly.
Finish and serve
Brush with remaining garlic butter, sprinkle Parmesan and parsley, and serve warm.
Last Step: Please leave a rating and comment letting us know how you liked this recipe! This helps our business to thrive and continue providing free, high-quality recipes for you.
Nutrition
Did You Make This?
Leave a comment & rating below or tag
@solushcooks on social media!
Categories:
You might also like...
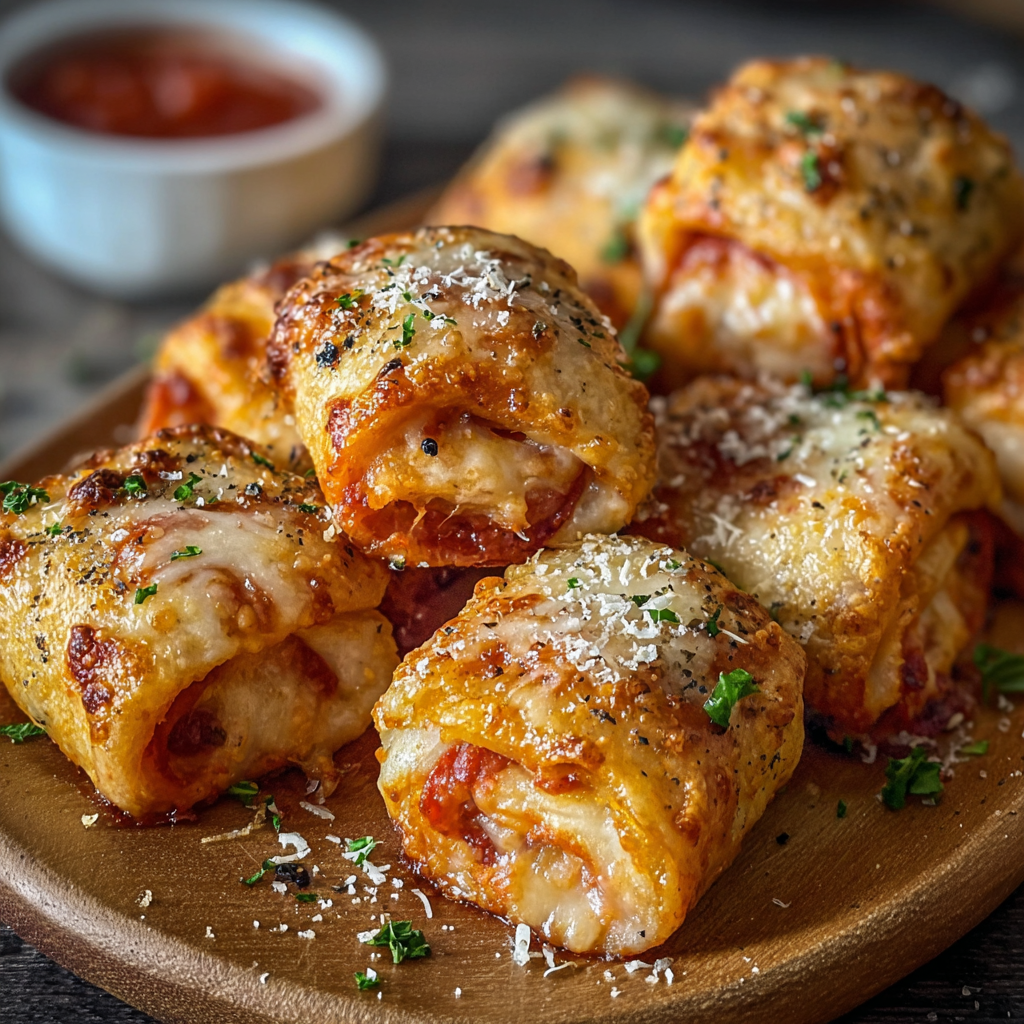
Air-Fried Pizza Rolls
Crispy, golden pockets of melted mozzarella and pepperoni made in the air fryer for a quick party snack or weeknight treat.
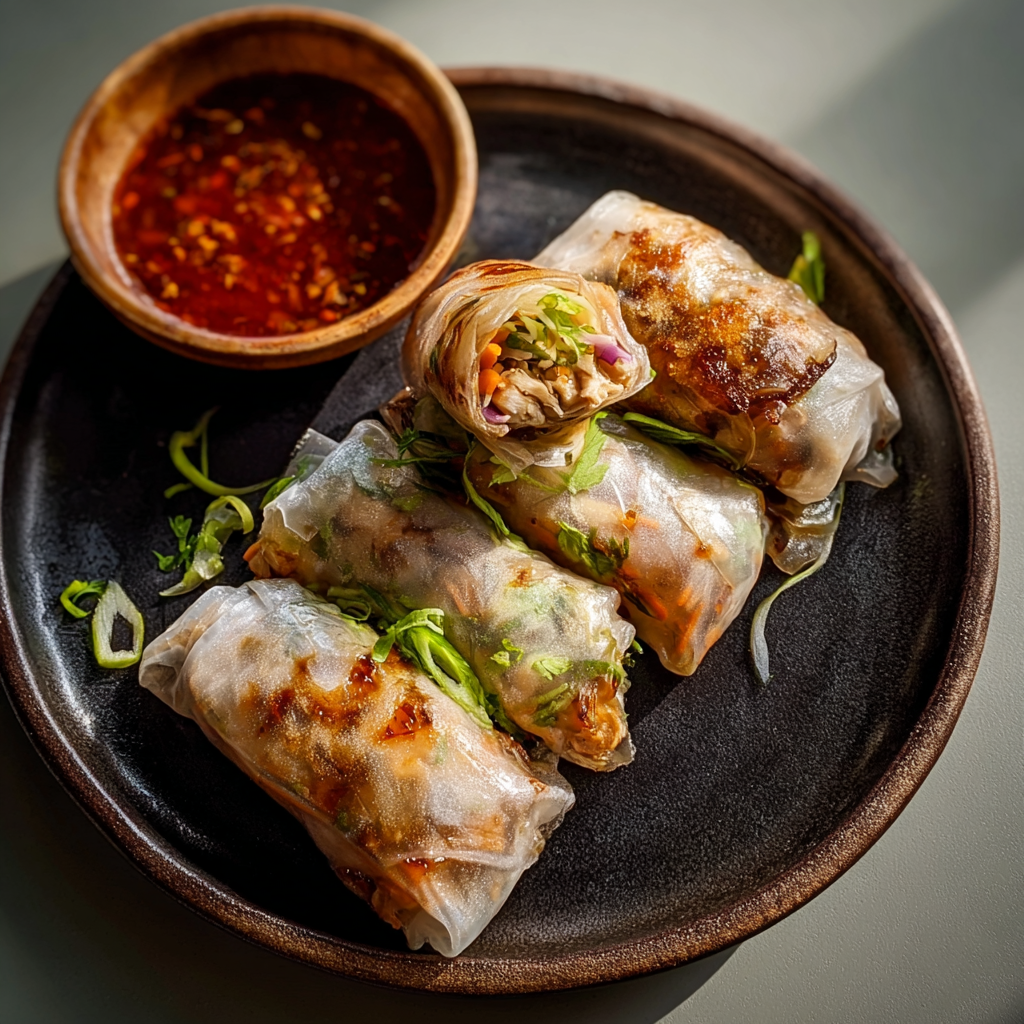
Air-Fried Rice Paper Noodle Rolls
Crispy, light rice paper rolls filled with vermicelli, vegetables and tofu or shrimp, finished in the air fryer for a healthy, snackable treat.
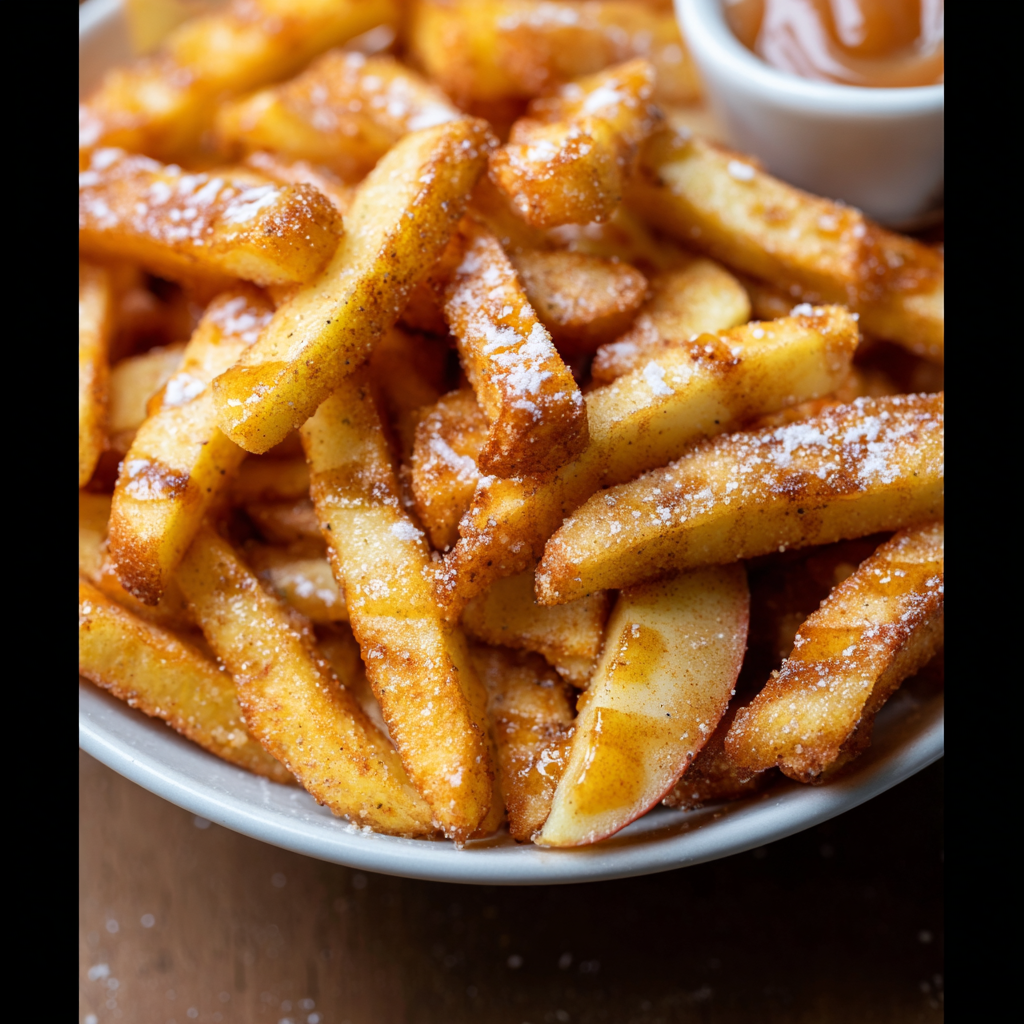
Air Fryer Apple Fries
Crispy, cinnamon-sugar coated apple fries made in the air fryer — a quick, family-friendly snack or dessert ready in under 30 minutes.
Did You Make This?
Leave a comment & rating below or tag @solushcooks on social media!
Rate This Recipe
Share This Recipe
Enjoyed this recipe? Share it with friends and family, and don't forget to leave a review!
Comments (1)
This recipe looks amazing! Can't wait to try it.
Comments are stored locally in your browser. Server comments are displayed alongside your local comments.

Hi, I'm Lena!
What's Popular
30-Minute Meals!
Join to receive our email series which contains a round-up of some of our quick and easy family favorite recipes.