
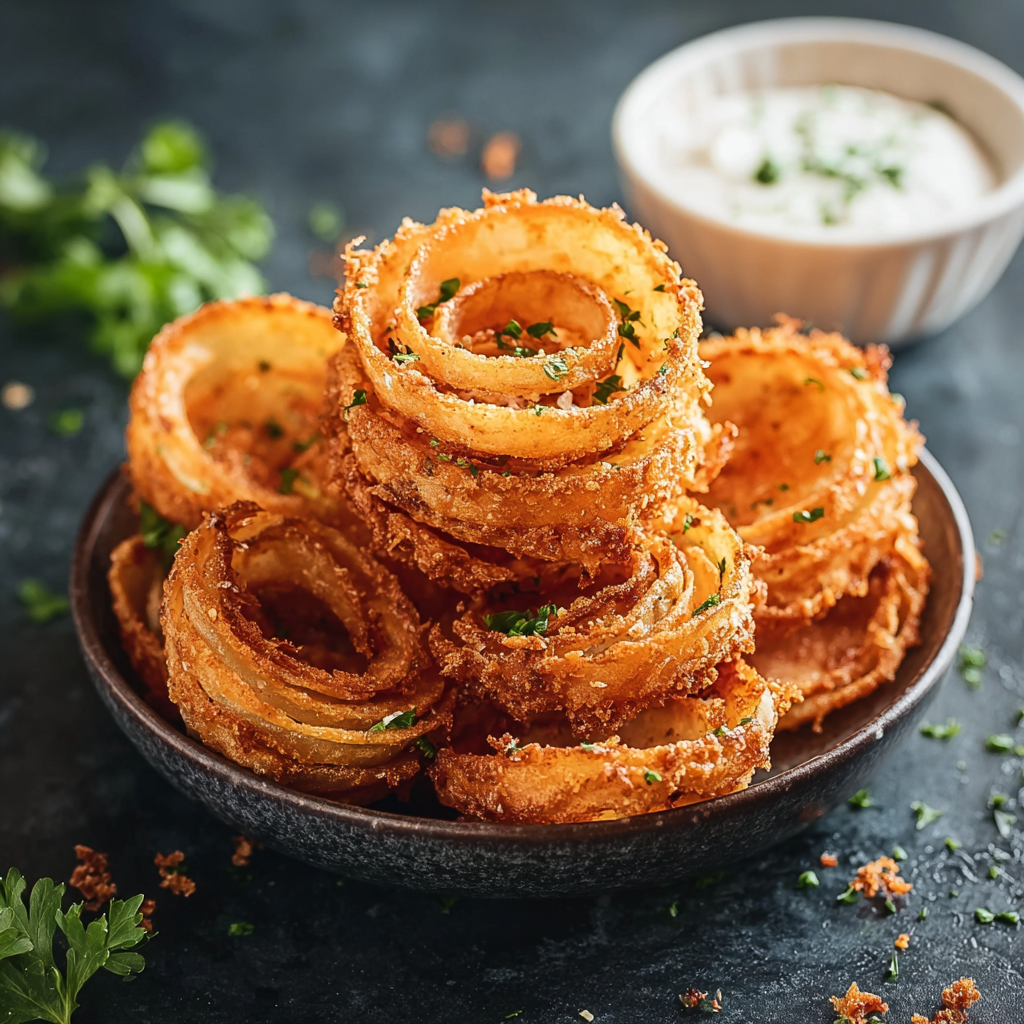
Onion Ring Chips

Crispy, golden onion ring chips coated in panko for an extra-crunchy bite — a perfect snack or party finger food that's ready in under 30 minutes.

This recipe for onion ring chips has been my favorite way to turn ordinary onions into irresistibly crunchy snacks. I first developed it one late afternoon when I wanted something to serve at a casual backyard gathering: something lighter than full-sized rings but with all the satisfying crunch. The panko breadcrumb coating creates a delicate, shattery crust while the thin 1/4-inch slices of onion cook quickly and caramelize just enough to highlight their natural sweetness. The result is a golden, snackable chip that disappeared faster than I could replenish the bowl.
I remember the first time my kids tried these — they declared them better than fries and asked for the recipe, then took turns dunking them in ketchup, ranch, and a homemade chipotle mayo. What makes these special is the combination of a tangy buttermilk soak and a double-dredge that delivers consistent adhesion and crunch. Because the slices are thin, they cook evenly and stay crisp for longer when drained properly. These chips are simple, fast, and ideal for serving as a party appetizer, a bar snack, or a crunchy side to a sandwich.
Why You'll Love This Recipe
- Ready in about 25 to 30 minutes from start to finish, perfect for last-minute entertaining or an afternoon snack.
- Uses pantry staples like all-purpose flour, garlic powder, and paprika, plus panko for extra crunch — no specialty flours required.
- Thin 1/4-inch slices mean fast, even cooking and a light, chip-like texture instead of a dense ring.
- Make-ahead option: you can bread the slices and refrigerate them for up to 1 day before frying to save time on party day.
- Crowd-pleasing and versatile — pairs well with ketchup, ranch, aioli, or spicy dips; great for kids and adults alike.
In my experience, guests love the contrast of the slightly sweet onion interior with the salty, crisp exterior. The first batch at that backyard party was gone in minutes, and the combination of simple ingredients made it a recipe I returned to again and again. It’s a small technique change — the buttermilk soak and panko — that elevates a humble onion into something addictive.
Ingredients
- Large onions: Use 2 large yellow or sweet onions, sliced into 1/4-inch rings. Look for firm bulbs without soft spots; sweet onions add a pleasant caramel note when fried.
- All-purpose flour: 1 cup to create the initial dry coating. Plain all-purpose flour gives structure and helps the buttermilk adhere.
- Garlic powder: 1 teaspoon for a warm, savory undertone that complements the onion's natural sweetness.
- Paprika: 1 teaspoon for color and a faint smoky sweetness; use regular or smoked paprika depending on preference.
- Salt: 1/2 teaspoon in the dredge plus extra to finish. Kosher or fine salt both work; adjust to taste.
- Black pepper: 1/2 teaspoon freshly ground for a sharp, balanced bite.
- Buttermilk: 1 cup to soak the rings briefly. Buttermilk tenderizes and adds tang, helping the coating cling while contributing flavor.
- Panko breadcrumbs: 2 cups for the final crust. Choose large-flake panko for maximum crunch; some brands are flakier and yield a lighter texture.
- Vegetable oil for frying: Enough for a 2-inch-deep layer in your skillet or about 4 cups if using a medium pot. Neutral oils like canola, vegetable, or peanut oil are best for high-heat frying.
Instructions
Prep the onions:Peel the onions and slice them into 1/4-inch-thick rings, separating the rings gently. Pat the rings dry with paper towels to remove excess moisture; this helps the coating stick and reduces splatter during frying. Keep the slices uniform so they cook at the same rate.Make the dry dredge:Combine 1 cup all-purpose flour, 1 teaspoon garlic powder, 1 teaspoon paprika, 1/2 teaspoon salt, and 1/2 teaspoon black pepper in a shallow bowl. Whisk to distribute spices evenly so each ring gets consistent seasoning.Soak in buttermilk:Place the rings in 1 cup buttermilk and toss to coat. Let them sit for 5 minutes; the buttermilk slightly tenderizes the onion and helps the flour layer adhere for a better crust.First dredge:Working in batches, remove rings from the buttermilk and shake off excess. Dredge each ring in the seasoned flour, pressing lightly so a thin, even layer forms. Transfer to a wire rack for a minute while you prepare the panko.Panko coat:Dip the floured rings briefly back into the buttermilk (just a quick dunk) and then press into 2 cups panko breadcrumbs, ensuring both sides are well-covered. For extra adhesion, press the panko firmly so it nestles into the flour layer.Heat the oil:Pour vegetable oil into a heavy skillet or pot to a depth of about 2 inches. Heat to 350°F (175°C) — use a thermometer for accuracy. Maintaining 350°F ensures a crisp exterior without overcooking the onion.Fry in batches:Carefully add a single layer of rings, avoiding overcrowding. Fry 2 to 3 minutes per side until golden brown and crisp. Use a slotted spoon or tongs to flip and then remove to a wire rack set over a baking sheet to drain. Sprinkle immediately with a pinch of salt.Finish and serve:Let the chips rest 1 to 2 minutes; they stay crisper if transferred to a rack rather than paper towels. Serve warm with dipping sauces like ketchup, ranch, or aioli.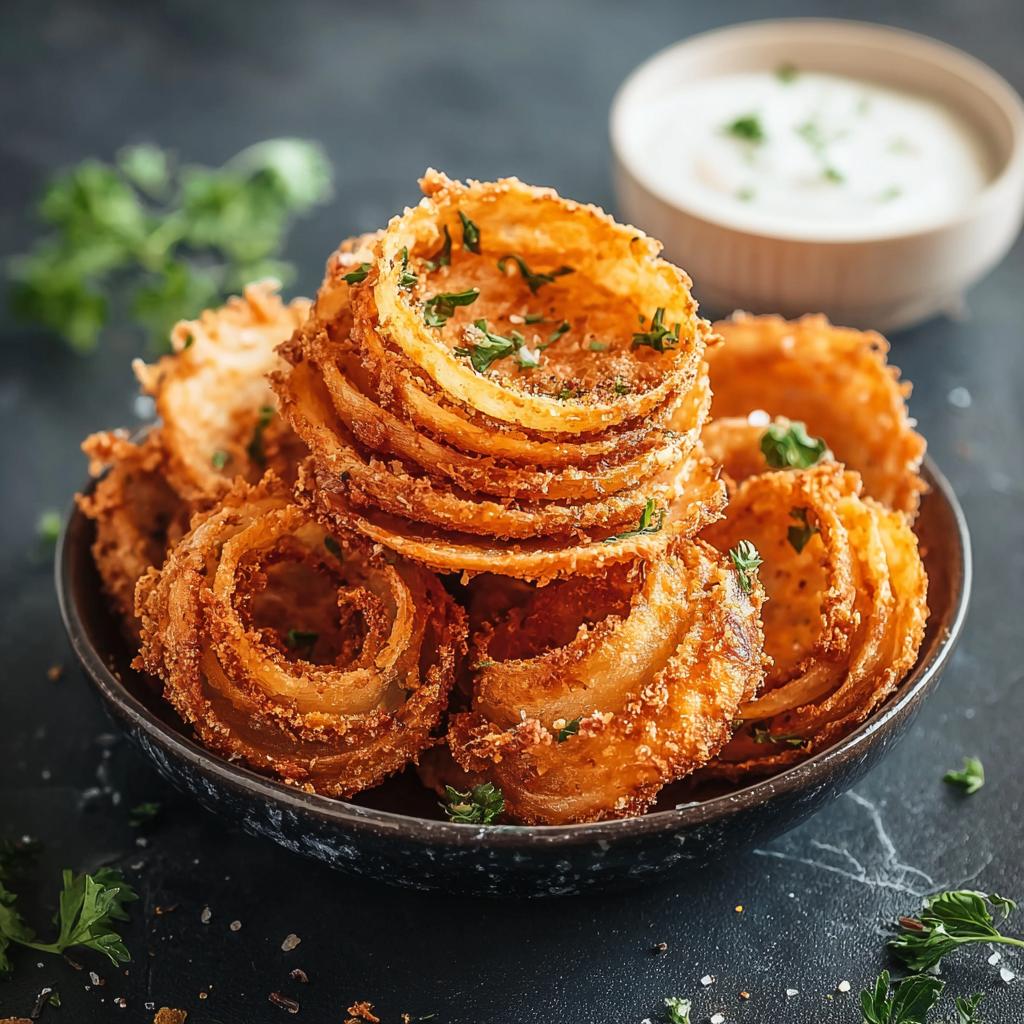
You Must Know
- Cook at a steady 350°F; oil that is too hot will burn the panko, and oil that is too cool will make the chips greasy.
- These chips freeze well if you flash-freeze on a tray and then store in an airtight bag for up to 3 months.
- Because buttermilk and panko are used, this is not dairy-free or gluten-free as written.
- Thin, even slices are essential to achieving crispness without sogginess; use a sharp knife or mandoline set to 1/4 inch.
My favorite part is how adaptable these chips are — at a tailgate, they replace potato chips, and at a dinner party they become a crunchy garnish for burgers or salads. Family members often request a double batch because the texture is so addictive, and I learned early that draining on a rack rather than paper towels preserves the crisp exterior much better.
Storage Tips
To store leftovers, cool the chips completely to room temperature then place them in an airtight container lined with paper towels to absorb residual oil. Keep refrigerated for up to 2 days, but reheating is recommended to restore crispness. Reheat in a 375°F oven for 6 to 8 minutes on a wire rack so air circulates; avoid microwaving because it makes them soft. For longer storage, flash-freeze the coated but uncooked rings on a baking sheet, then transfer to a freezer bag and fry from frozen — add about 30 seconds to the frying time.
Ingredient Substitutions
If you don’t have buttermilk, make a quick substitute by combining 1 cup milk with 1 tablespoon lemon juice or white vinegar and letting it sit for 5 minutes. For a gluten-free version, swap the all-purpose flour and panko for a 1:1 gluten-free flour blend and gluten-free breadcrumbs, though the crunch may be slightly different. For a dairy-free tweak, replace buttermilk with a thin batter of unsweetened almond milk stirred with a teaspoon of vinegar and add a pinch of xanthan gum to help adhesion.
Serving Suggestions
Serve these chips as an appetizer with a trio of dips: classic ketchup, herb ranch, and spicy sriracha aioli. They also make an excellent crunchy topping for burgers, pulled pork sandwiches, or a smoked salmon salad. Garnish with chopped chives or a dusting of smoked paprika for color. For a casual spread, pair with slaw, pickles, and sliders for a complete experience.
Cultural Background
Thin fried onion snacks have variations in many cuisines — from British thick rings to Indian pakora, where sliced vegetables are coated in a spiced chickpea batter. These onion ring chips are a modern, Americanized take that borrows the crisp panko technique often used in Japanese cooking. The approach emphasizes lightness and texture, blending familiar flavors with a delicate, flaky coating that elevates a simple vegetable into a shareable comfort-food favorite.
Seasonal Adaptations
In summer, use sweet onions and serve alongside fresh tomato salads and grilled meats. In fall, try adding 1/4 teaspoon ground cumin or smoked paprika to the panko for a warmer spice profile that complements roasted squash. For winter holidays, offer a cranberry-mustard dip or top the chips with a crumbled blue cheese and pear compote for a festive twist. Small seasonal changes can shift the chips from casual snack to refined accompaniment.
Meal Prep Tips
For efficient meal prep, slice the onions and keep them in a single layer on a tray in the fridge for a day. Assemble the flour and panko stations on a sheet pan and bread the rings in batches, then refrigerate the prepared rings for up to 24 hours. Fry just before serving to ensure maximum crispness. Use disposable gloves when breading to speed up cleanup, and label any frozen batches with the date to maintain quality.
These onion ring chips are a small technique triumph that transforms everyday ingredients into something you’ll reach for again and again. Share them warm, dip generously, and enjoy the crunch.
Pro Tips
Dry the onion rings well before breading to reduce oil splatter and improve adhesion.
Maintain oil temperature at 350°F (175°C) for crisp, non-greasy chips.
Drain fried chips on a wire rack over a baking sheet to preserve crispness.
This nourishing onion ring chips recipe is sure to be a staple in your kitchen. Enjoy every moist, high protein slice — it is perfect for breakfast or as a wholesome snack any time.
Tags
Onion Ring Chips
This Onion Ring Chips recipe makes perfectly juicy, tender, and flavorful steak every time! Serve with potatoes and a side salad for an unforgettable dinner in under 30 minutes.
Ingredients
Main
Dredge
Soak and Coating
For Frying
Instructions
Slice and dry onions
Peel 2 large onions and slice into 1/4-inch rings. Separate the rings and pat dry with paper towels to remove surface moisture for better adhesion.
Prepare dry dredge
Mix 1 cup flour, 1 teaspoon garlic powder, 1 teaspoon paprika, 1/2 teaspoon salt, and 1/2 teaspoon black pepper in a shallow bowl to create a seasoned flour.
Buttermilk soak
Place rings in 1 cup buttermilk and let sit 5 minutes; this tenderizes and helps the coating stick.
First dredge
Shake off excess buttermilk and dredge each ring in the seasoned flour, ensuring an even thin layer before setting on a rack.
Panko coating
Quickly dip the floured rings back into buttermilk and press into 2 cups panko breadcrumbs so they are well-coated on both sides.
Heat oil
Heat vegetable oil to 350°F (175°C) in a heavy skillet or pot to a depth of about 2 inches. Use a thermometer for accuracy.
Fry in batches
Fry the rings in a single layer for 2 to 3 minutes per side until golden and crisp. Avoid overcrowding and drain on a wire rack.
Season and serve
Sprinkle with a pinch of salt while hot and serve immediately with your choice of dips.
Last Step: Please leave a rating and comment letting us know how you liked this recipe! This helps our business to thrive and continue providing free, high-quality recipes for you.
Nutrition
Did You Make This?
Leave a comment & rating below or tag
@solushcooks on social media!
Categories:
You might also like...
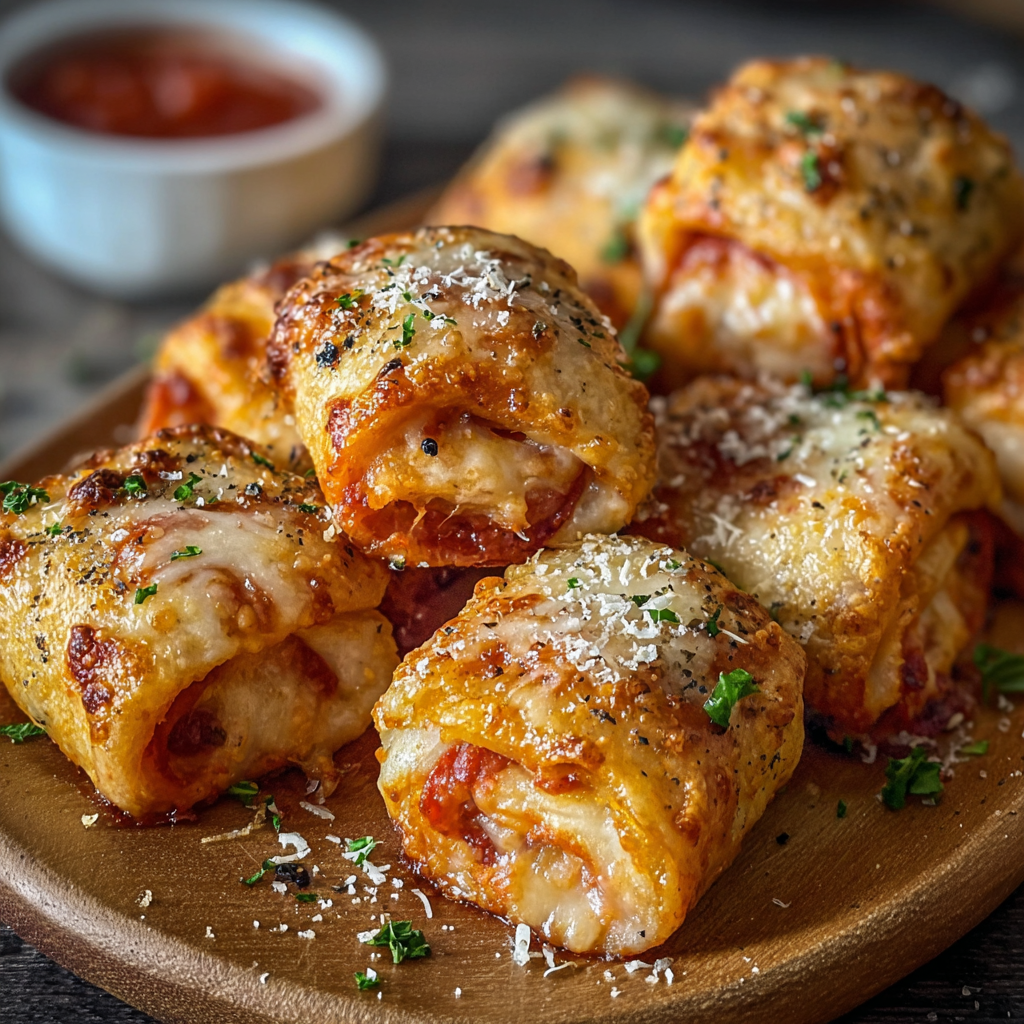
Air-Fried Pizza Rolls
Crispy, golden pockets of melted mozzarella and pepperoni made in the air fryer for a quick party snack or weeknight treat.
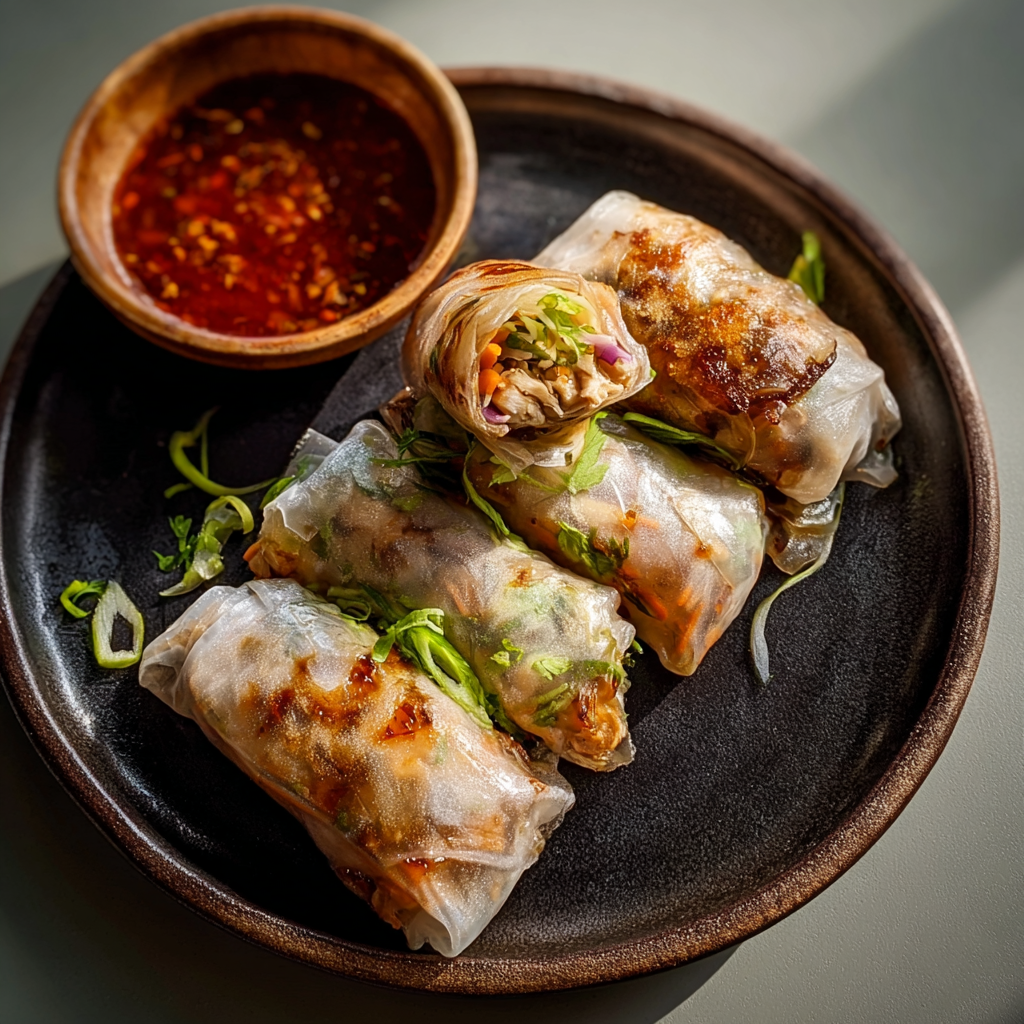
Air-Fried Rice Paper Noodle Rolls
Crispy, light rice paper rolls filled with vermicelli, vegetables and tofu or shrimp, finished in the air fryer for a healthy, snackable treat.
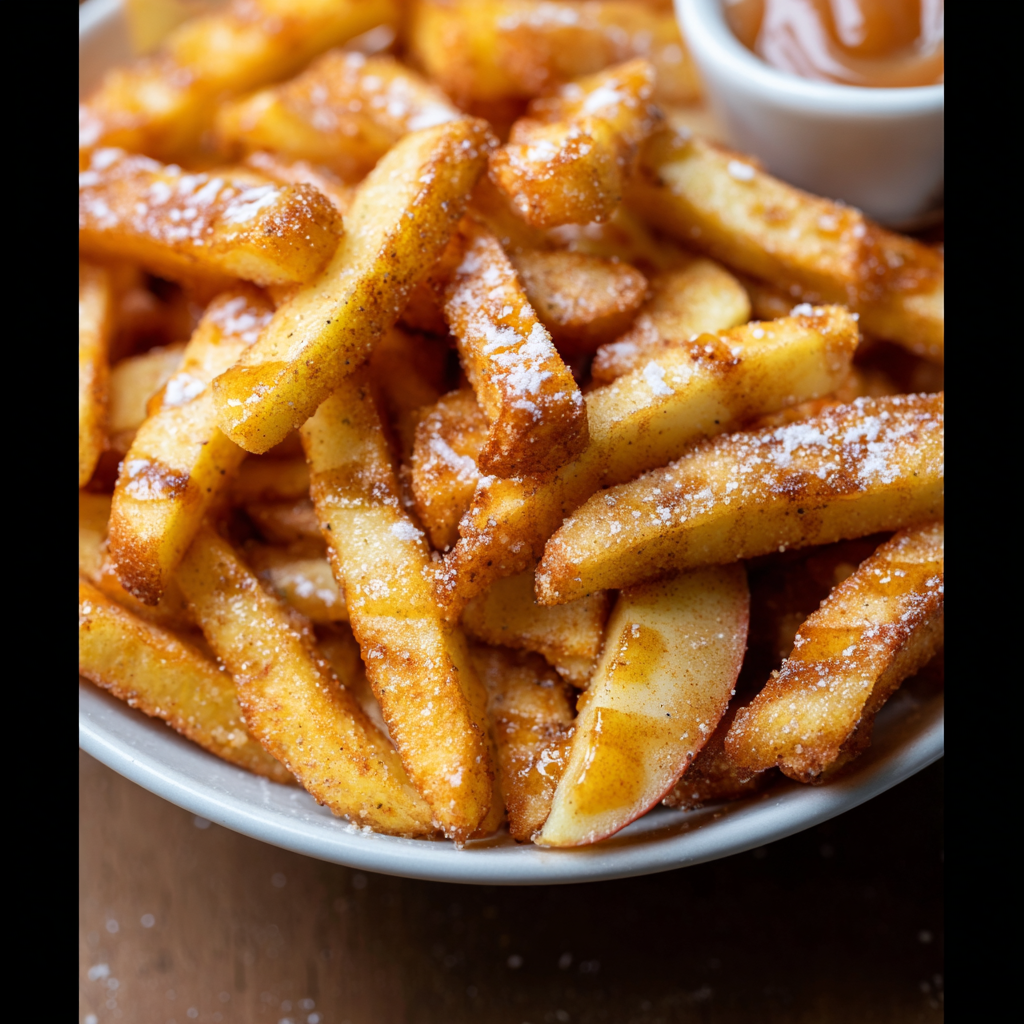
Air Fryer Apple Fries
Crispy, cinnamon-sugar coated apple fries made in the air fryer — a quick, family-friendly snack or dessert ready in under 30 minutes.
Did You Make This?
Leave a comment & rating below or tag @solushcooks on social media!
Rate This Recipe
Share This Recipe
Enjoyed this recipe? Share it with friends and family, and don't forget to leave a review!
Comments (1)
This recipe looks amazing! Can't wait to try it.
Comments are stored locally in your browser. Server comments are displayed alongside your local comments.

Hi, I'm Lena!
What's Popular
30-Minute Meals!
Join to receive our email series which contains a round-up of some of our quick and easy family favorite recipes.