
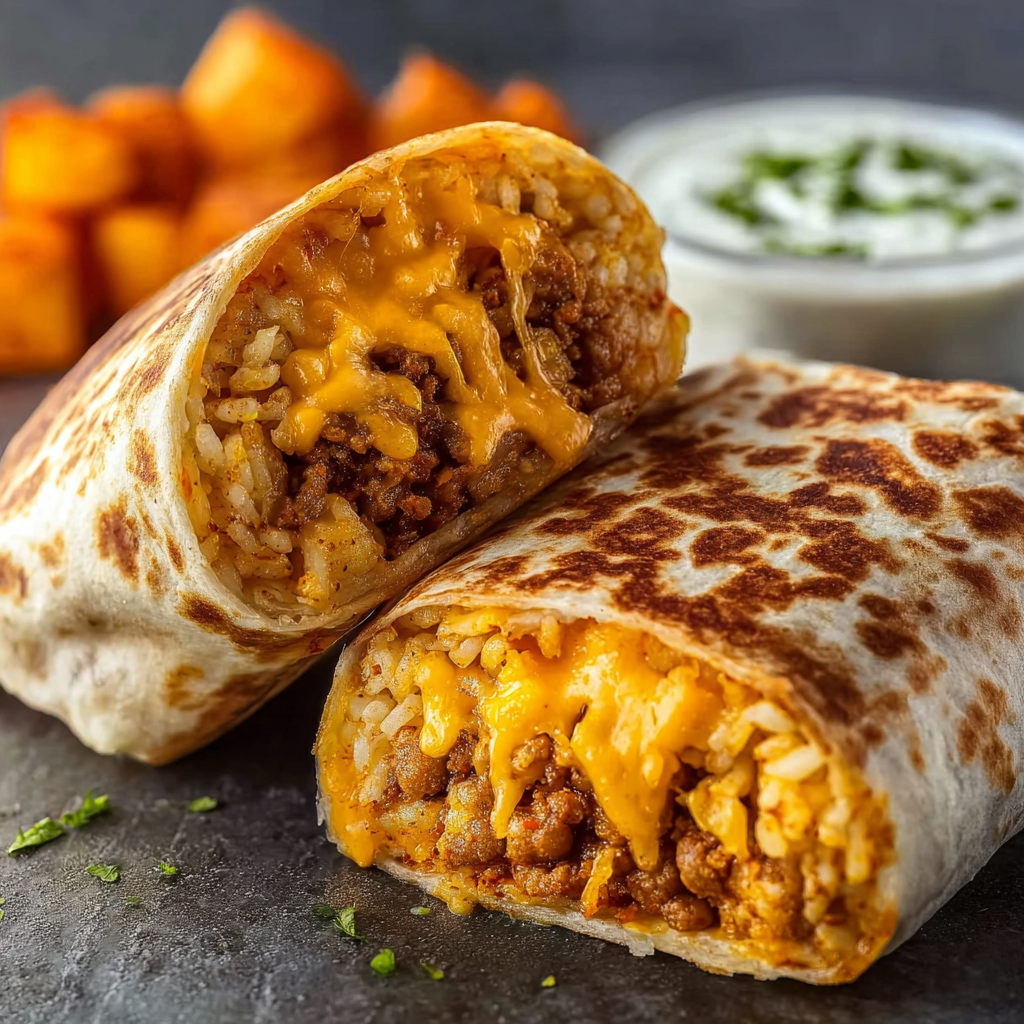
Potato and Cheese Burrito

A satisfying, family-friendly burrito filled with seasoned ground beef, crispy tater tots, melty cheddar and Monterey Jack, finished with chipotle sauce and sour cream.

Why You'll Love This Recipe
- Ready in about 30 minutes: cooks quickly on the stovetop and uses oven-finished tater tots for reliable crispiness and convenience.
- Comforting crowd-pleaser: hearty flavors and melty cheese make it approachable for kids and adults alike; great for casual gatherings.
- Flexible protein: uses ground beef but swaps easily to ground turkey or a plant-based alternative for dietary needs.
- Pantry-friendly: relies on freezer tater tots and staples like flour tortillas, making it simple to pull together on short notice.
- Make-ahead friendly: filling can be cooked ahead and refrigerated; just reheat and assemble for quick meals or meal prep lunches.
I still remember the first time I brought these to a potluck — they disappeared within minutes. Family members asked for the recipe and then for it to be part of our regular rotation. The leftovers keep surprisingly well and the flavors deepen overnight, making the burritos even better the next day when reheated gently in a skillet or oven.
Ingredients
- Ground beef (1 pound): Choose 80/20 for flavor and juiciness; leaner options like 93/7 will be lighter but drier. If using plant-based crumbles, select a brand that browns well and seasons easily.
- Frozen tater tots (2 cups): Any brand works; use the oven or air-fryer directions on the package for maximum crispiness. Tots add texture and make this feel indulgent without extra prep.
- Shredded cheddar (1 cup): Sharp cheddar gives a tangy bite that contrasts with the creaminess of Monterey Jack. Pre-shredded is convenient, but block cheese melts best if you grate it yourself.
- Shredded Monterey Jack (1 cup): Adds a smooth, milky melt and helps the cheese layer stretch nicely inside the wrap.
- Sour cream (1/2 cup): Provides cooling creaminess; light sour cream works in a pinch, but full-fat gives the best mouthfeel.
- Chipotle sauce (1/4 cup): I use a Taco Bell–style chipotle sauce for smoky heat; adjust to taste. Substitute with adobo sauce thinned with a little mayo for a different profile.
- Large flour tortillas (6): Look for burrito-size tortillas (10–12 inches) for easy wrapping and to hold the filling without bursting.
- Salt and pepper: Simple seasoning for the beef; add a pinch of garlic powder or smoked paprika if you like extra depth.
- Optional toppings: Diced tomatoes, chopped green onions, cilantro — add brightness and freshness at the end.
Instructions
Prepare the tater tots: Cook the frozen tater tots according to package instructions until deeply golden and very crisp. For best results, use the oven and spread them on a single layer on a baking sheet; this creates contrast against the soft filling. If using an air fryer, 400°F for 10–12 minutes usually works. Brown the meat: Heat a large skillet over medium-high heat. Add the ground beef and season with salt and pepper. Break it up with a spatula and cook until nicely browned and no longer pink, about 6–8 minutes. Drain excess fat or spoon off most but leave a tablespoon for flavor. For turkey or plant-based alternatives, brown until any excess moisture has evaporated and edges begin to caramelize. Season and combine: Reduce heat to medium and taste the meat, adjusting seasoning. Stir in a few chopped green onions if using. Allow the meat to cool slightly off the direct heat so the cheese won’t immediately clump when added. Assemble the filling: Coarsely chop or crush half of the crispy tater tots and fold them into the meat with the shredded cheddar and Monterey Jack, saving some tots and cheese for topping. The crushed tots meld into the filling and keep a pleasant texture without becoming mushy. Warm the tortillas: Heat each flour tortilla briefly on a dry skillet over medium heat for 10–15 seconds per side or wrap a stack in a damp paper towel and microwave 20–30 seconds. Warm tortillas are more flexible and less likely to tear when rolling. Fill and roll: Spoon an even portion of the filling onto the center of each tortilla. Top with a drizzle of chipotle sauce and a dollop of sour cream. Add diced tomatoes, cilantro, or additional cheese as desired. Fold the sides inward, then roll from one end to form a snug burrito. Finish and serve: Optionally, toast the sealed burrito seam-side down in a hot skillet with a teaspoon of oil for 1–2 minutes per side to crisp the exterior and warm through. Serve immediately with extra chipotle sauce, sour cream, and fresh garnishes.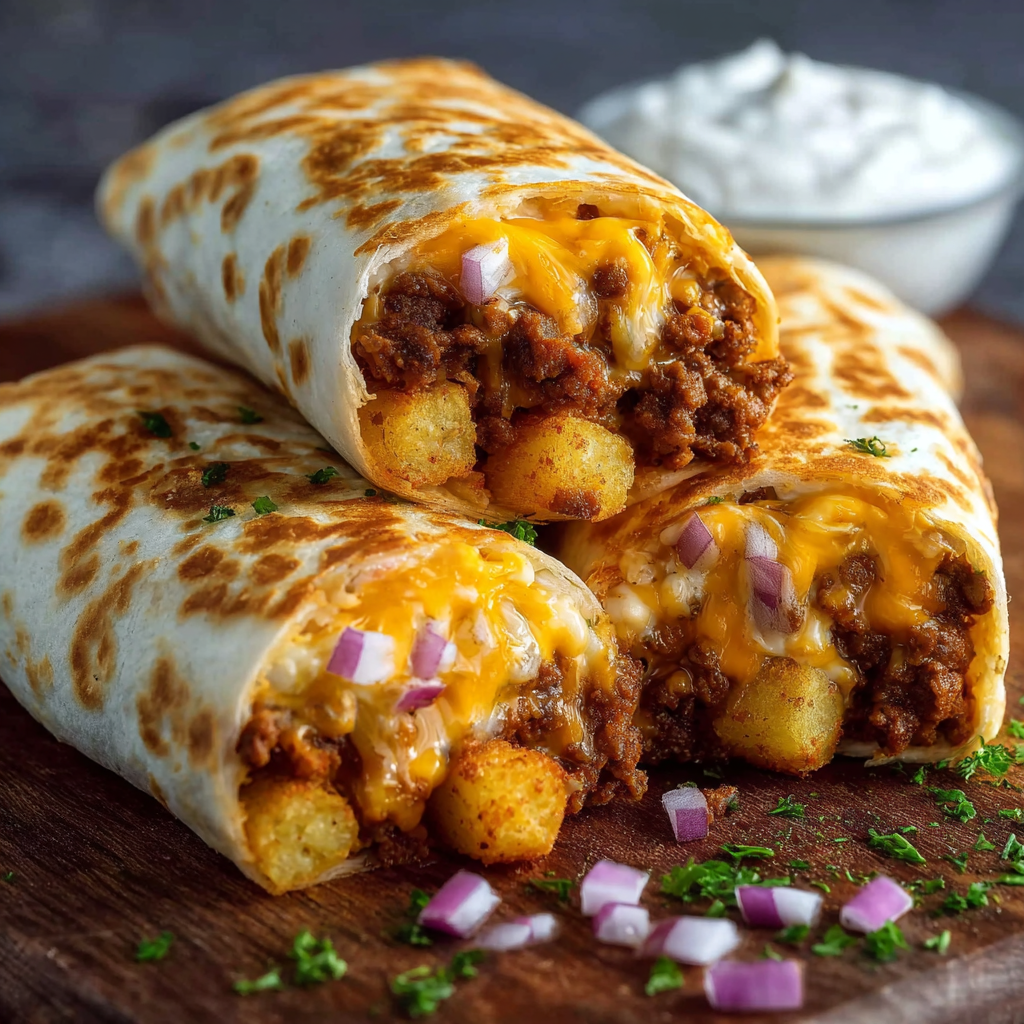
You Must Know
- High protein and comforting: with a full pound of meat and two cheeses, the burritos are hearty and satisfying for dinner or late-night snacking.
- Storage: filling keeps for up to 3 days refrigerated; fully assembled burritos can be wrapped and refrigerated for 1–2 days, or frozen for up to 3 months.
- Reheating: thaw frozen burritos in the refrigerator overnight, then reheat in a 350°F oven for 15–20 minutes for best texture; a skillet finish maintains crispness.
- Nutrition note: not gluten-free or dairy-free by default; simple swaps make it adaptable for many diets.
My favorite part is how customizable these are — everyone at our table customizes toppings and sauce levels. We’ve served them for informal brunches, game nights, and quick dinners, and they consistently draw compliments. The contrast between crispy tots and soft filling is what keeps people coming back for bites and seconds.
Storage Tips
Store the cooked filling in an airtight container in the refrigerator for up to 3 days. If you’ve assembled burritos ahead, wrap each tightly in parchment or foil and place in an airtight container or freezer bag. For freezing, label with the date and freeze for up to 3 months. To reheat refrigerated burritos, unwrap and warm them in a 350°F oven for 10–12 minutes, or pan-fry seam-side down to re-crisp the tortilla. Frozen burritos thaw overnight in the fridge or can be reheated from frozen at 325°F for 25–30 minutes, turning once, until heated through and the cheese is melty.
Ingredient Substitutions
Swap the ground beef for ground turkey, chicken, or a plant-based crumble to reduce fat or accommodate dietary preferences. Replace the flour tortillas with large gluten-free wraps for a gluten-free version; note that some gluten-free wraps are more fragile and benefit from warming. For dairy-free, omit cheeses and sour cream and use dairy-free shredded cheese and a vegan crema. If you prefer more vegetables, add sautéed bell peppers and onions to the meat or swap tater tots for roasted sweet potato cubes for a slightly sweeter profile.
Serving Suggestions
Serve with a simple side salad, pickled jalapeños, or a bowl of black beans and rice to create a fuller meal. Garnish with chopped cilantro, diced tomatoes, and a wedge of lime to add brightness. For brunch, cut burritos in half and serve with a runny fried egg on top. For a party, set up a burrito bar with extra sauces — salsa, guacamole, and extra chipotle sauce — and let guests assemble their own with toppings like shredded lettuce and pickled onions.
Cultural Background
While burritos originate from northern Mexico and have numerous traditional variations, this particular preparation is an American comfort adaptation that borrows diner-style flavors and convenience foods like tater tots. Stuffed tortillas and handheld wraps have been reinvented across cultures — this version reflects a hybrid approach: simple, fast, and crowd-pleasing, blending classic Mexican-inspired flavors with familiar American textures and convenience ingredients.
Seasonal Adaptations
In winter, add a spoonful of warming spices such as smoked paprika or a pinch of cumin to the meat for a cozy depth. In summer, swap the tater tots for a light grilled corn and roasted pepper mix and finish with a fresh mango salsa for brightness. Around holidays, incorporate leftover roasted vegetables or turkey for a post-celebration twist — the filling adapts well to many cooked leftovers and still feels indulgent and fresh when paired with creamy sauce and cheese.
Meal Prep Tips
Cook the meat and crisp the tater tots on Sunday, then combine and portion the filling into meal-sized servings for quick assembly during the week. Keep tortillas separate and warm them briefly when you’re ready to eat so they remain flexible. For grab-and-go breakfasts, assemble burritos, wrap tightly in foil, and store single portions in the fridge for up to 2 days or freeze for longer storage. Reheat in a toaster oven or skillet to maintain a crisp exterior.
This burrito brings the kind of satisfying, no-fuss comfort that becomes a regular part of the weekly rotation. Whether you’re feeding a family, hosting friends, or meal-prepping for the week, it’s adaptable, quick, and reliably delicious — give it a try and make it your own with the toppings and swaps that fit your tastes.
Pro Tips
Warm tortillas briefly on a dry skillet or in the microwave wrapped in a damp paper towel to prevent tearing during rolling.
Crisp tater tots in the oven or air fryer for best texture; avoid steaming them with the filling to keep contrast.
Toast the finished burrito seam-side down in a hot skillet to seal and add a pleasant crunch.
If making ahead, cool the filling completely before refrigerating to avoid sogginess.
Use block cheese and grate it yourself for the best melt and texture.
This nourishing potato and cheese burrito recipe is sure to be a staple in your kitchen. Enjoy every moist, high protein slice — it is perfect for breakfast or as a wholesome snack any time.
Tags
Potato and Cheese Burrito
This Potato and Cheese Burrito recipe makes perfectly juicy, tender, and flavorful steak every time! Serve with potatoes and a side salad for an unforgettable dinner in under 30 minutes.
Ingredients
Meat and Potato Filling
Cheese and Sauces
Wraps and Seasoning
Optional Toppings
Instructions
Cook the tater tots
Preheat oven or air fryer and cook frozen tater tots according to package directions until golden and very crisp. Spread them in a single layer for even browning.
Brown the meat
Heat a large skillet over medium-high heat. Add ground beef, season with salt and pepper, and cook until browned and no longer pink, about 6–8 minutes. Drain excess fat if necessary.
Season and rest
Reduce heat to medium, adjust seasoning, and let the meat rest slightly off direct heat so it doesn’t immediately seize the cheese when combined.
Combine filling
Chop half the tater tots and fold them into the meat along with both cheeses. Reserve some tots and cheese for topping each burrito prior to rolling.
Warm tortillas
Warm tortillas briefly on a dry skillet or in the microwave wrapped in a damp paper towel to improve flexibility and prevent tearing during rolling.
Assemble burritos
Place filling on each tortilla, add a drizzle of chipotle sauce and a spoon of sour cream, then fold sides in and roll tightly from one end to the other.
Finish and crisp
Optional: toast each burrito seam-side down in a hot skillet with a little oil for 1–2 minutes per side to crisp the exterior and warm through.
Serve
Serve immediately with additional chipotle sauce, sour cream, and optional toppings like diced tomatoes, chopped green onions, and cilantro.
Last Step: Please leave a rating and comment letting us know how you liked this recipe! This helps our business to thrive and continue providing free, high-quality recipes for you.
Nutrition
Did You Make This?
Leave a comment & rating below or tag
@solushcooks on social media!
Categories:
You might also like...

Air-Fried Pizza Rolls
Crispy, golden pockets of melted mozzarella and pepperoni made in the air fryer for a quick party snack or weeknight treat.
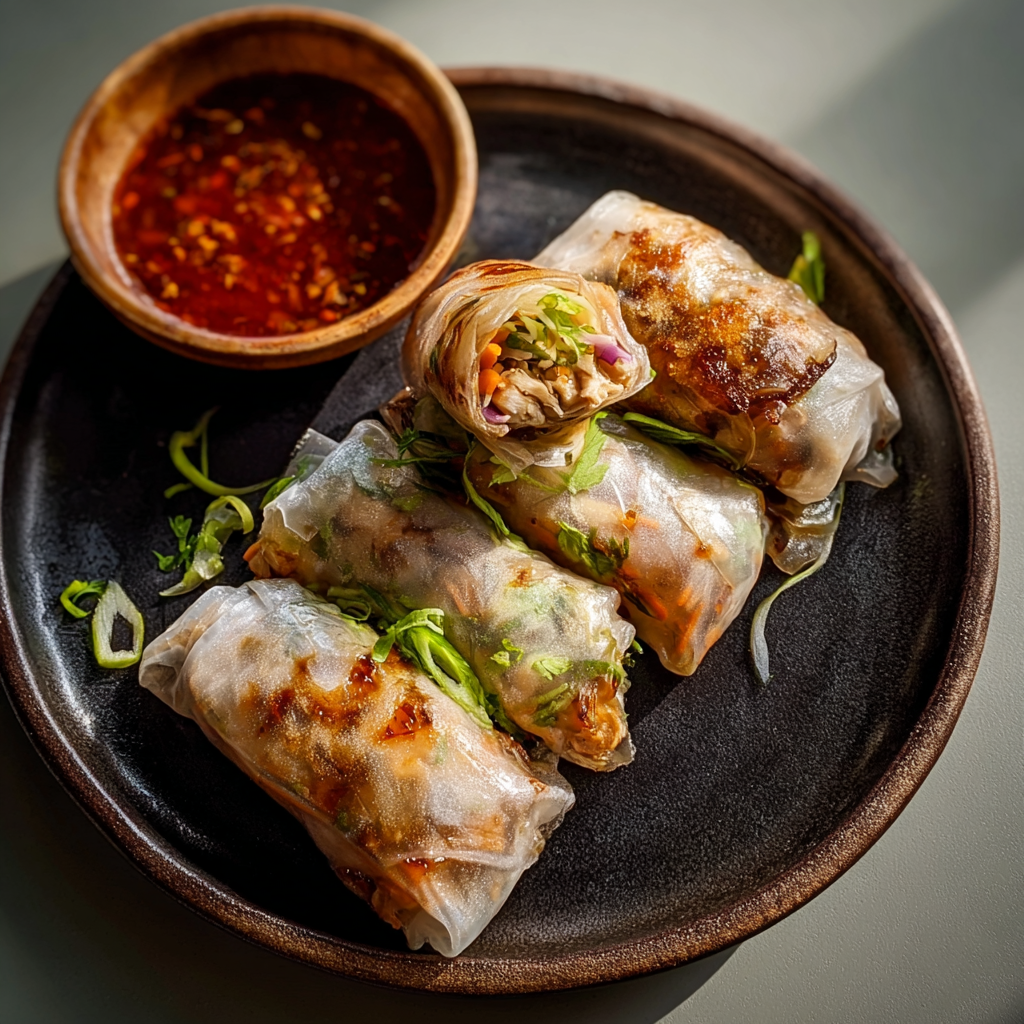
Air-Fried Rice Paper Noodle Rolls
Crispy, light rice paper rolls filled with vermicelli, vegetables and tofu or shrimp, finished in the air fryer for a healthy, snackable treat.
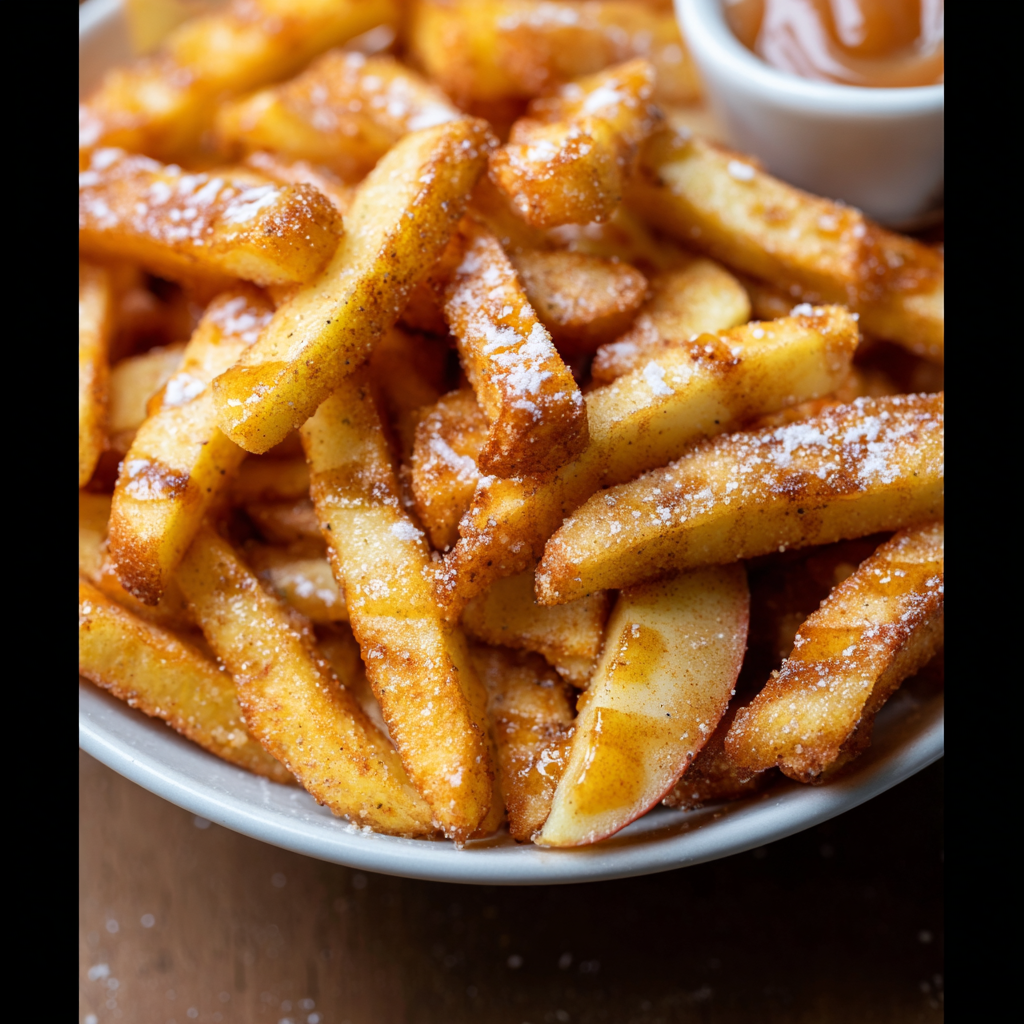
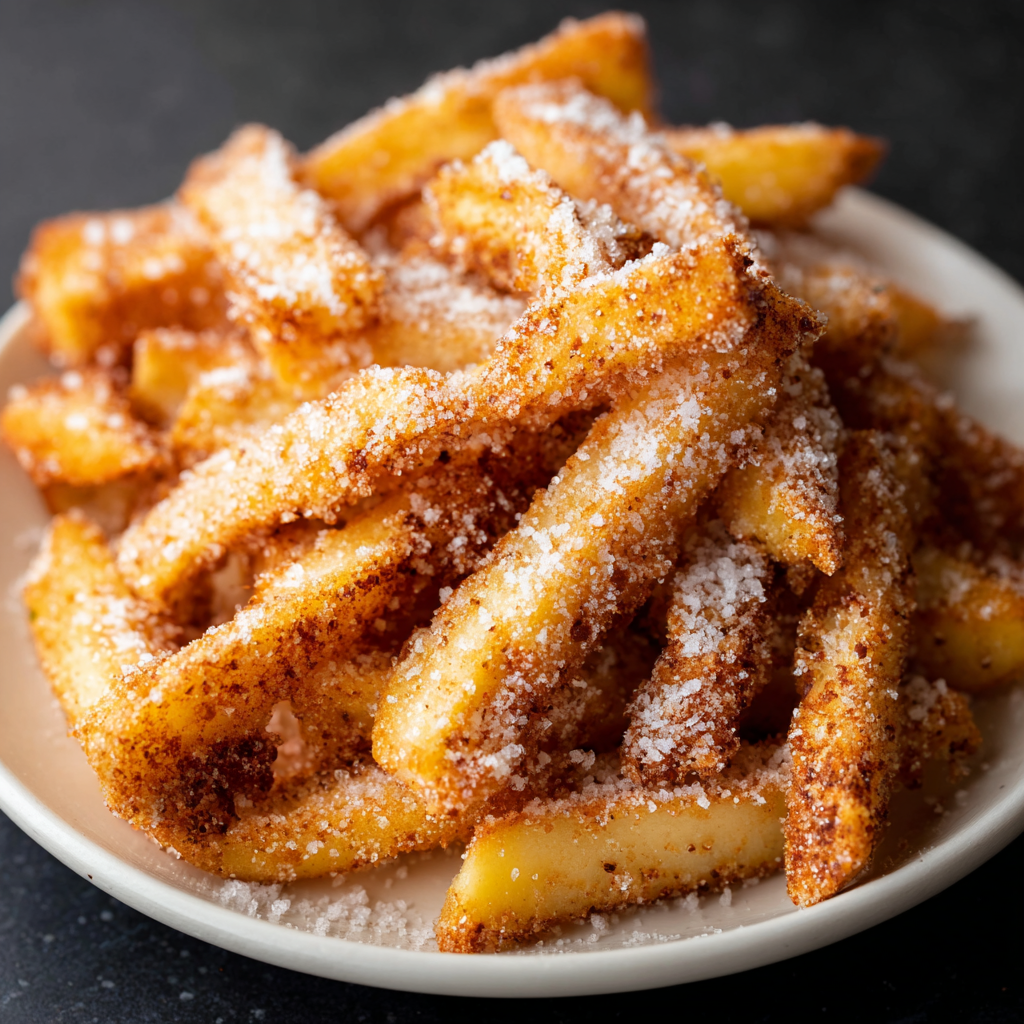
Air Fryer Apple Fries
Crispy, cinnamon-sugar coated apple fries made in the air fryer — a quick, family-friendly snack or dessert ready in under 30 minutes.
Did You Make This?
Leave a comment & rating below or tag @solushcooks on social media!
Rate This Recipe
Share This Recipe
Enjoyed this recipe? Share it with friends and family, and don't forget to leave a review!
Comments (1)
This recipe looks amazing! Can't wait to try it.
Comments are stored locally in your browser. Server comments are displayed alongside your local comments.

Hi, I'm Lena!
What's Popular
30-Minute Meals!
Join to receive our email series which contains a round-up of some of our quick and easy family favorite recipes.